Certass Export
Similar to Fensa, Certass information can be logged within AdminBase, and then exported out to be registered with Certass.
Requirements
Contract Data
The Certass data is entered into the Details Page of a Contract. And here you will see a list of information that needs to be entered.
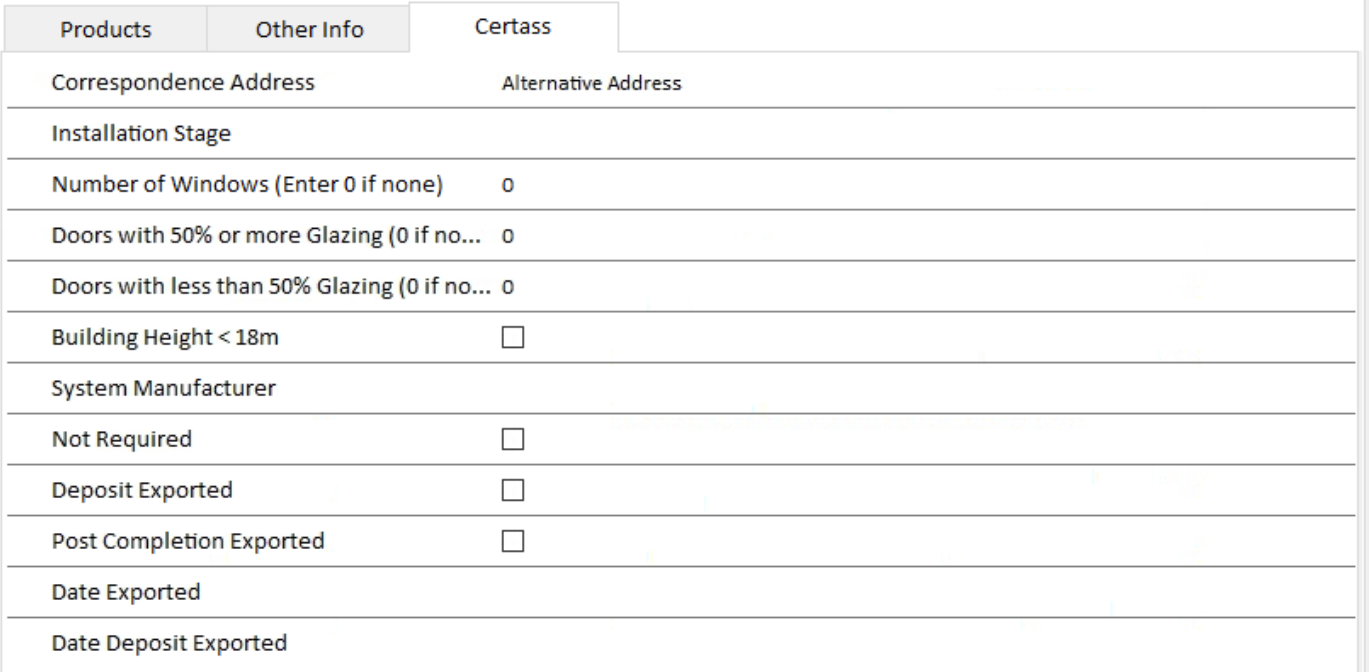
Correspondence Address
The address where Certass will send the certification paperwork.
Alternative Address – Will export the AdminBase Customer Address
Installation Address – Will export the AdminBase Fitting Address
Installation Stage
Whilst all of the different stages that Certass give options for are available in the dropdown list, it is most likely that only 2 options would be needed (and are catered for at present).

Deposit – Select this if you need to export Deposit details when offering Customer Deposit Payment Protection. You will still be able to do a Post Completion export with this selected.
<Blank> - Leaving the Installation Stage field empty will indicate that you will only be performing a Post Completion export, which will be triggered by the Date Installation Completed/Delivered/Collected field on the Fitting Page of a Contract being filled in.
Number of Windows
Mandatory. A value has to be recorded.
Doors with 50% or more Glazing
Mandatory. A value has to be recorded.
Doors with less than 50% Glazing
Mandatory. A value has to be recorded.
Building Height < 18m
Tick the checkbox to indicate that the Building height is less than 18m.
System Manufacturer
A free-text field to type in the System Manufacturer.
Not Required
Tick the checkbox to indicate that the Contract does not need any Certass data exporting.
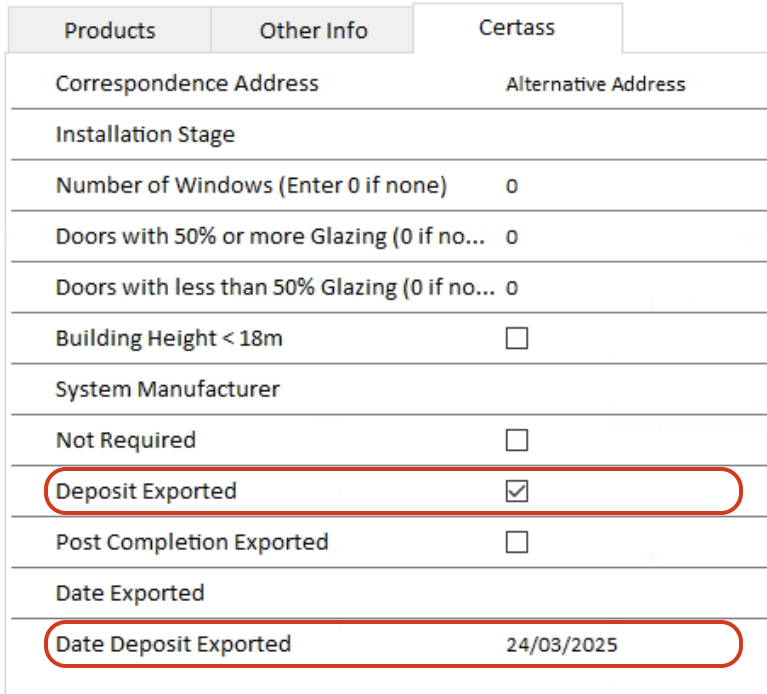
Deposit Exported
This checkbox will be ticked when instructed to do so as part of the export of Customer Deposit Protection when exporting from AdminBase in the “Modify Records Options” section of the export. (see also Date Deposit Exported, below)
Post Completion Exported
This checkbox will be ticked when instructed to do so as part of the export of Post Completion export from AdminBase in the “Modify Records Options” section of the export. (see also Date Exported, below)
Date Exported
The date that a (Post Completion) Date export has taken place and will be automatically filled in when instructed to tick the (Post Completion) Exported checkbox in the “Modify Records Options” section of the export.
Date Deposit Exported
The date that a Customer Deposit Protection export has taken place and will be automatically filled in when instructed to tick the Deposit Exported checkbox as part of the “Modify Records Options” section of the export.
Personnel
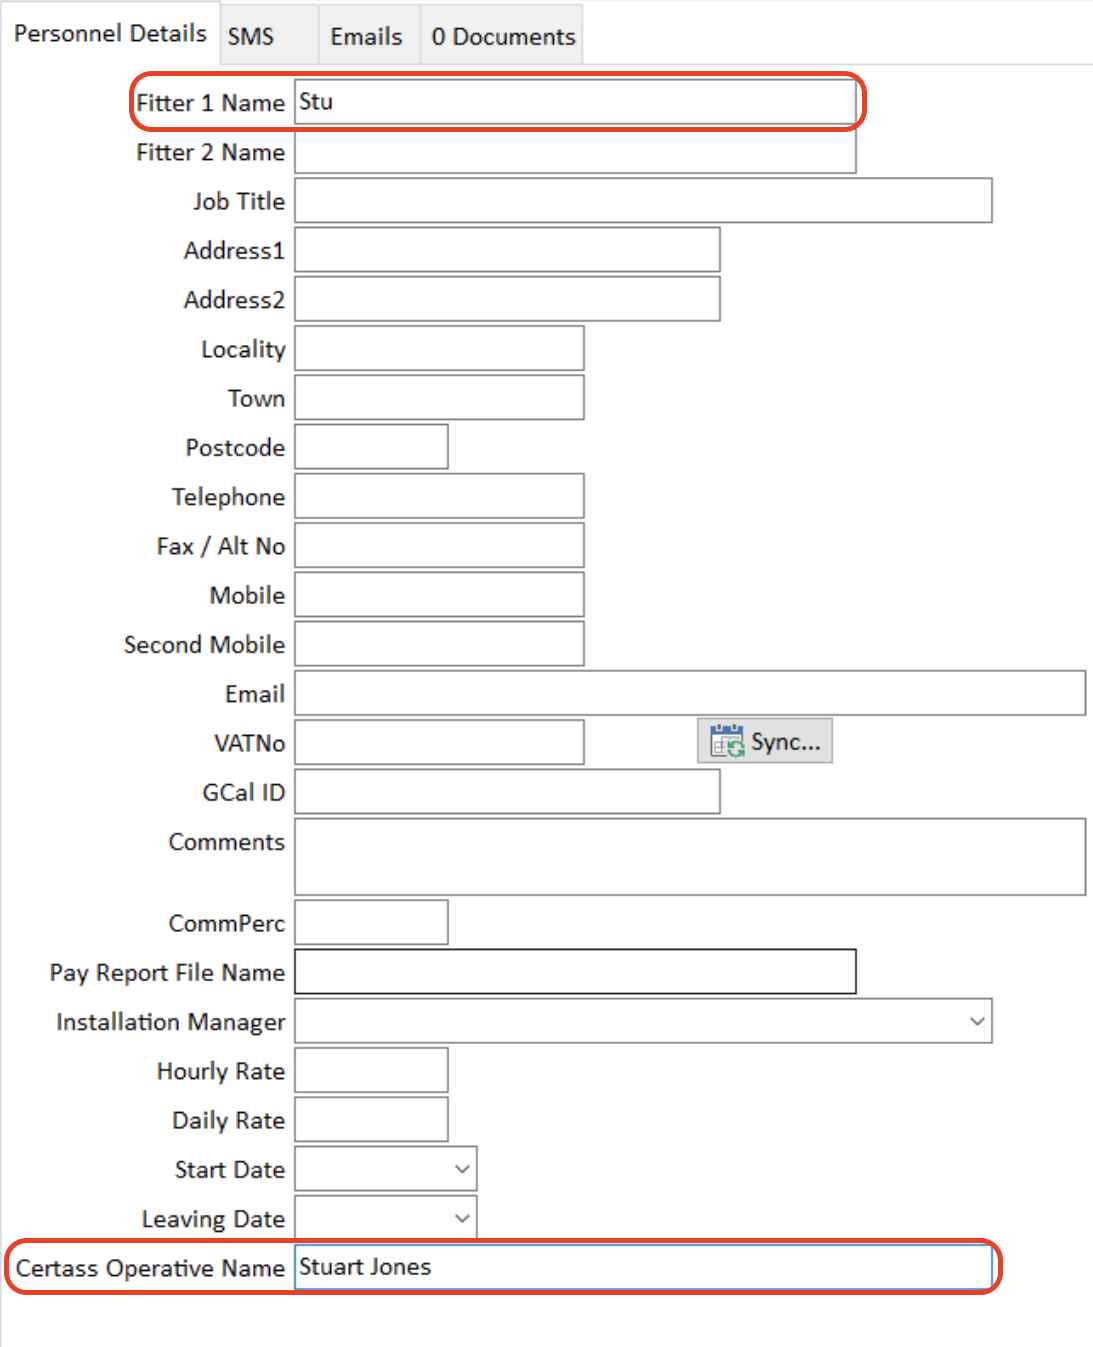
When exporting the names of the Personnel involved in an Installation, they are expected to have already been registered with Certass as a Competent Person.
Note that, to avoid records being refused during the Certass import, ensure that they have exactly the same spelling/capitalisation/spacing in both AdminBase and Certass.
This is not always easy to do for a number of reasons, so the setting up of the AdminBase Personnel caters for those instances where the Fitters Name does not match that same persons name registered with Certass.
So, if your Fitter is referenced in AdminBase with a different, shortened or nickname, you will need to fill in the “Certass Operative Name” in their Personnel record with the name recorded with Certass.
Exporting / Importing
Exporting to Certass can be done in the following 2 ways…
Using the API to push the contract directly to Certass
Importing a batch of contracts to Certass using an export created in AdminBase
1. Certass API
Please note, the Certass API requires version 2025.12.14.475 or later
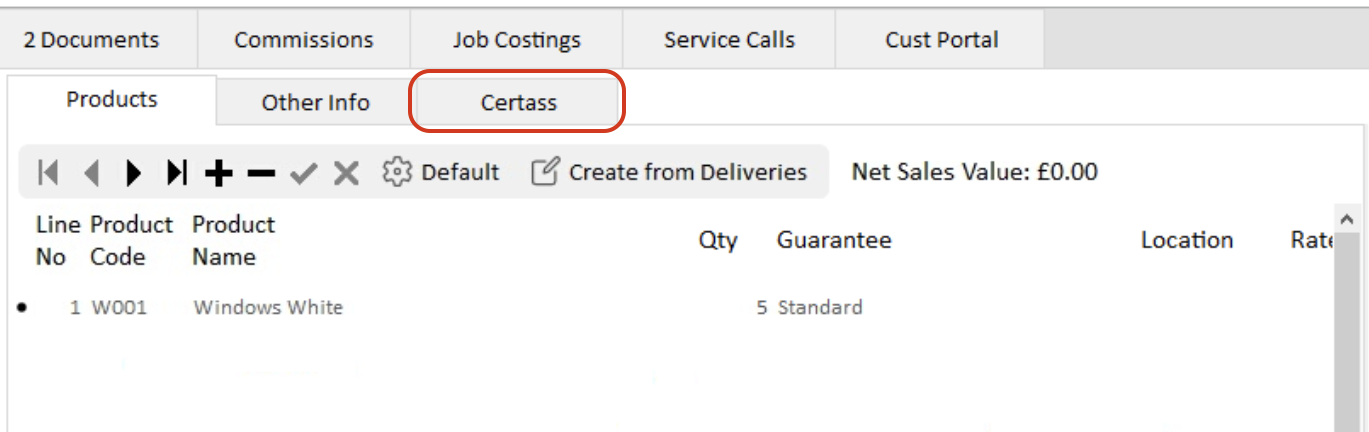
Once the installation information has been filled in, at the top of the Certass tab in AdminBase, click the Send button.

Here you can check the installation information, including values and glazing information.
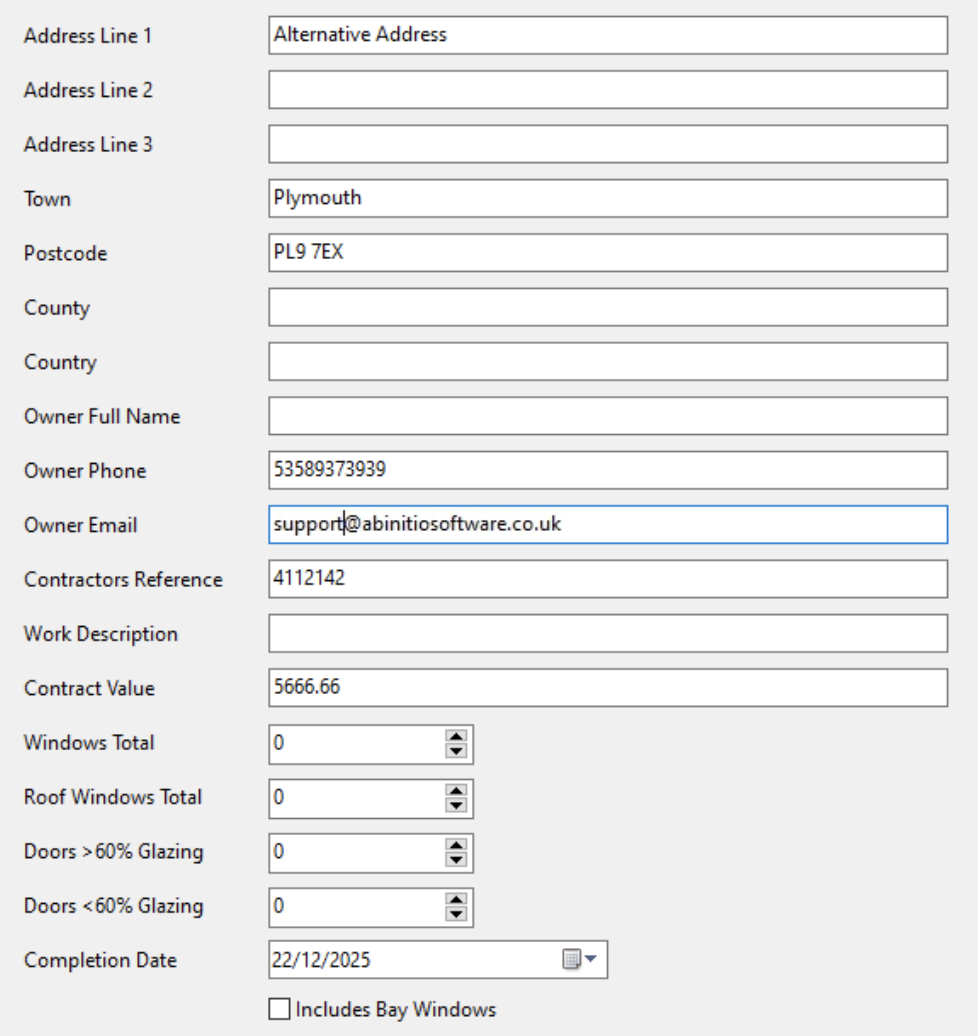
You then need to enter business and registration related information including:
Business Scope - The type of work carried out under the Certass regulation
Registration Scope - The current stage of the installation being registered
Building Use - The intended use of the building where the installation is taking place
Building Classification - The specific structural classification of the building
Products - The type of products included in the installation
Installers - The personnel listed for the installation
Supervisors - The personnel resposible for overseeing the installation
Surveyors - The personnel responsible for surveying the property
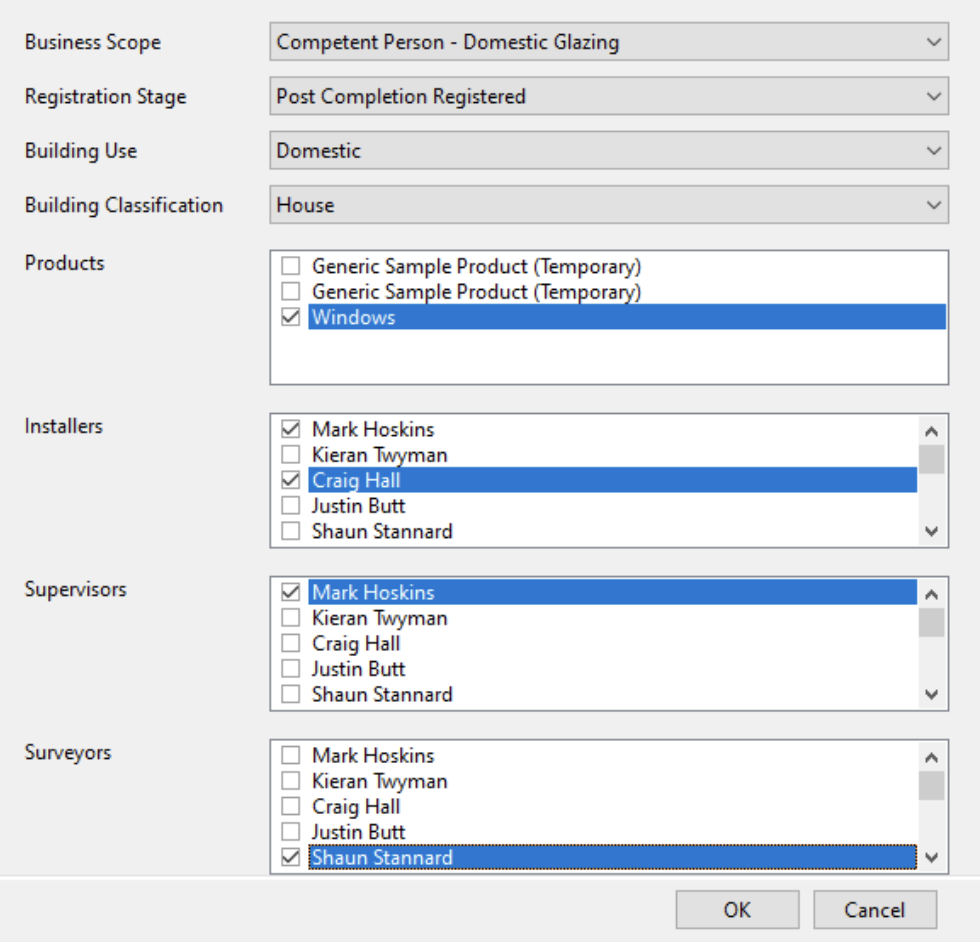
Once all information has been entered click OK to send your submission to Certass.
Important - Once submitted, the job must be signed-off via the members’ portal interface. At the point of signing-off there is a 24hr grace period where by one update can be made to the installation in the case of mistakes, but this too must be done via the interface. An edit cannot be made via the API.
2. Batch Importing
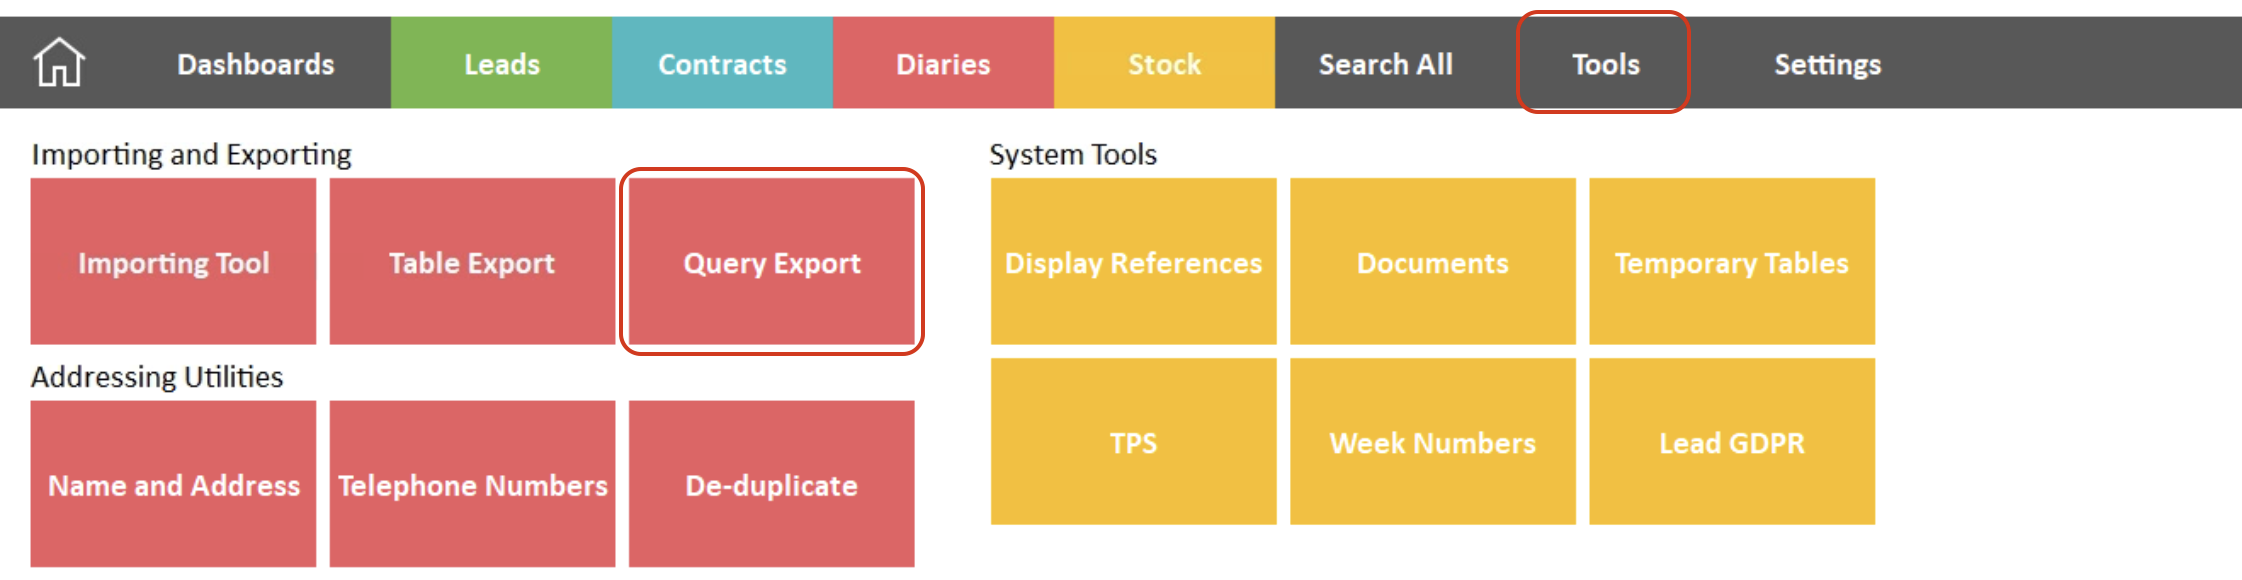
You export the Certass Data using the Query Export facility of the Tools menu
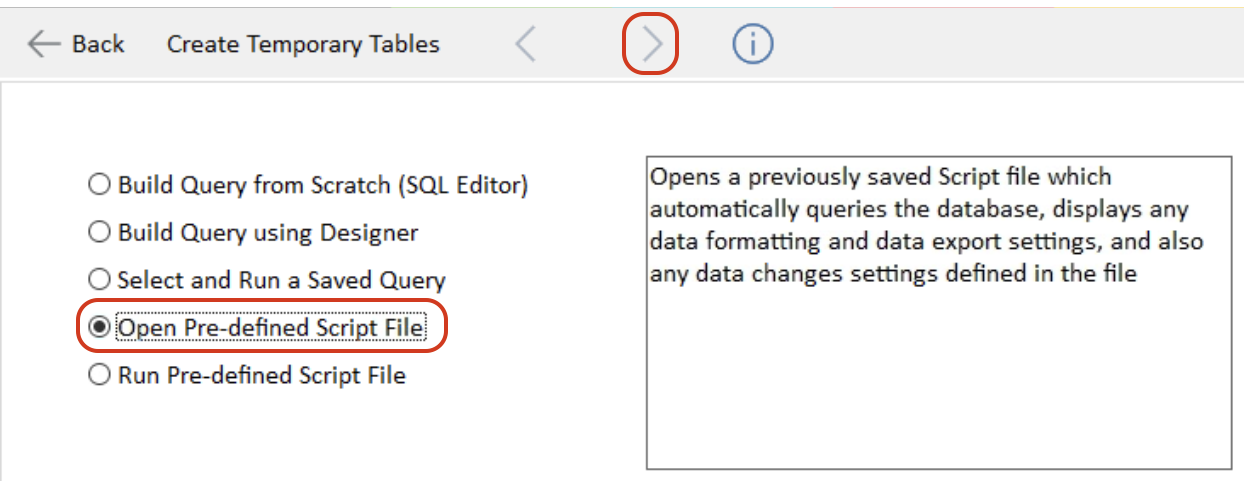
Select the Open Pre-defined Script File option and then use the Next Button (>) to proceed to the next stage where you choose which Script to run...
Select the Script file depending upon which Export you are performing. The actual Filename used by your company may vary but should be evident from the wording; for example…
“...CONTRACT_COMPLETE...” would be the Post Completion export.
“...DEPOSIT_PAID...” would be the Customer Deposit Protection export.

Export Data Options
The selected Script will run a Query (which in normal circumstances you would not see as part of the export process), which will select eligible records for export, and display them in the “Export Data Options” page for you preview before actually exporting
We need to export a Comma Separated Value (CSV) file, so we will only be looking at the settings in the Export Data (Value Separated File) section of the page.
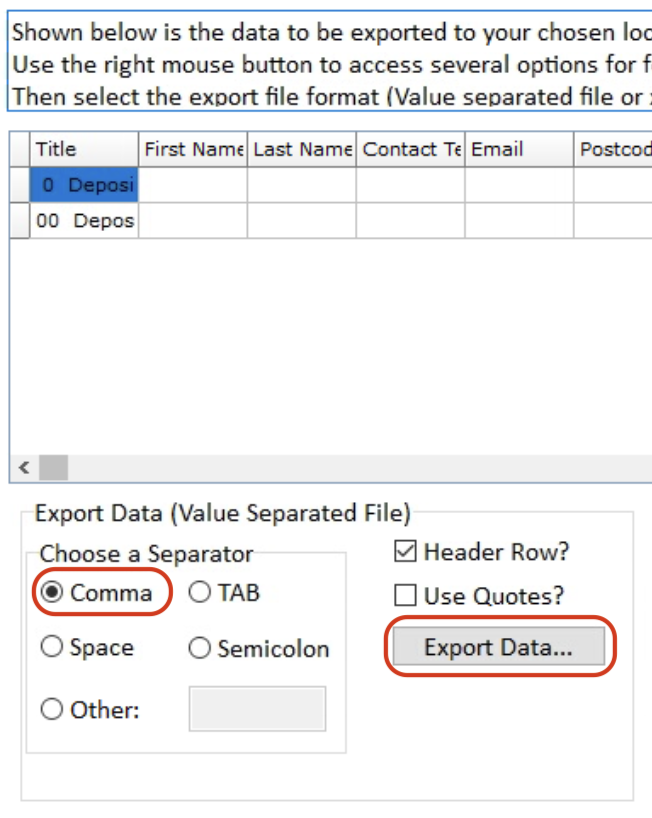
The top part of this page will display the records found that meet the criteria to be exported.
In the case of a Certass export the top 2 lines (starting with ‘0’ and ‘00’) are “dummy” lines that are part of the export that you create as the Certass Import is expecting them to be there.
Ensure that only the Comma Separator option has been selected and click the Export Data button.
You will now be asked to save the Export File that will be created, so select a folder to save the file in and ensure that the file name ends in a .csv file extension.
Modify Records Options
After the Export File has been created, you now have the option of marking the batched Contracts as having been exported so that they will not be considered for export again.
From the Export Data Options page, click on the Next button (>) to take you to the Modify Records Options page.
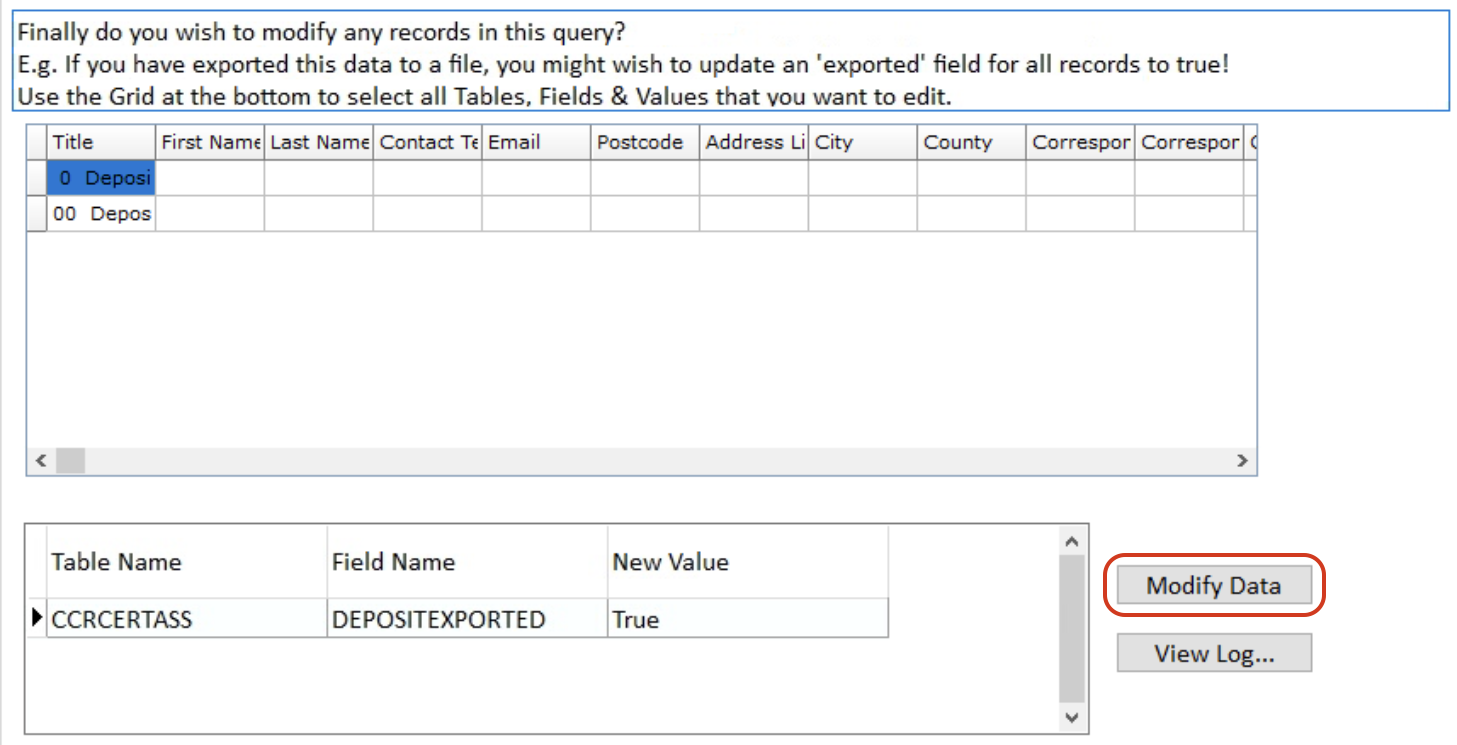
Here you can press the Modify Data button. This marks the listed Contracts as having been exported. Which fields are modified depend up the type of Export Script used.
In the above example screenshot, we can see that the DEPOSITEXPORTED field will be modified. Clicking the Modify Data button will therefore result in the batched Contracts for export will being modified this way.
When the records have been Modified you can now close the Query Export Tool by clicking the Back button.
You will be asked if you want to save the steps to a (Script) file. Unless you have made some changes that you need to keep for future exports, you would answer No to this which would take you back to the AdminBase Tools page.