Emailing Instructions
Applies to AdminBase Ver 2022.5.24.1 or later
In AdminBase you can send…
Emails with a subject line containing AdminBase data
Emails with a body containing AdminBase data
Emails with attachments containing AdminBase data
Ad hoc emails constructed from Multiple Subjects, Bodies and Signatures
Emails from the Document list
To do this there are some things needed in your report definitions. Support is available to help you with this but here are some instructions to get you started.
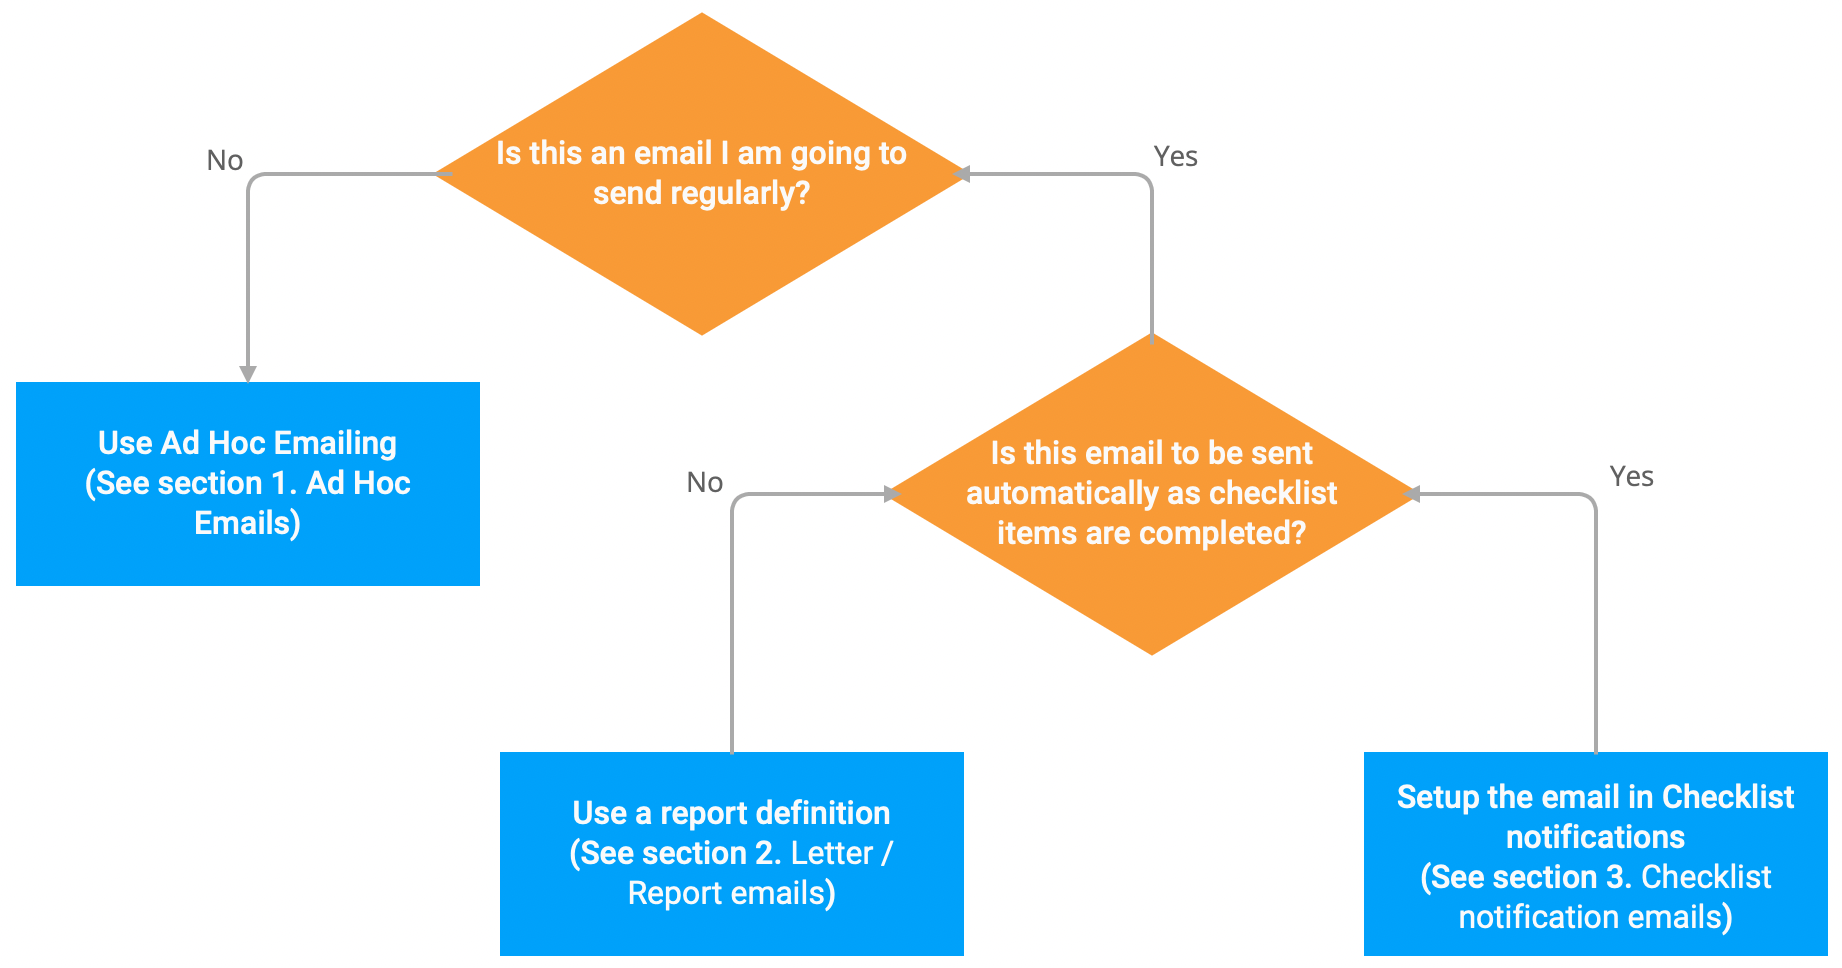
The following flow diagram can help you decide which type of email to send within AdminBase
1. Ad Hoc Emailing
Within the Lead or Contract browser, right click on a record and choose Email.
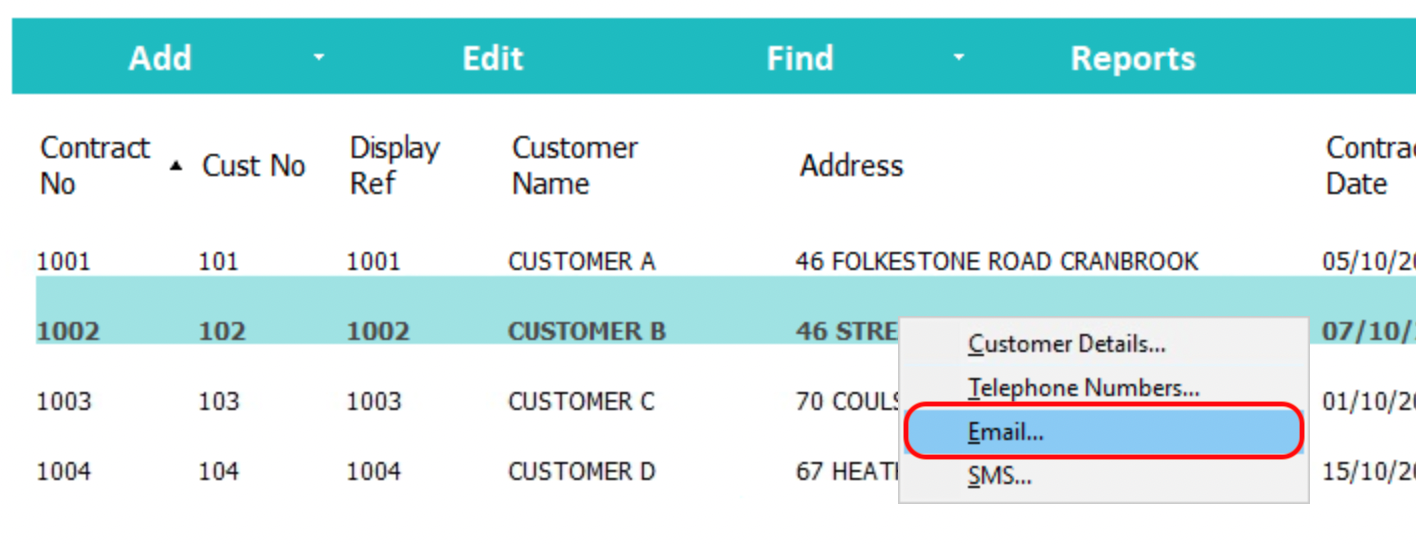
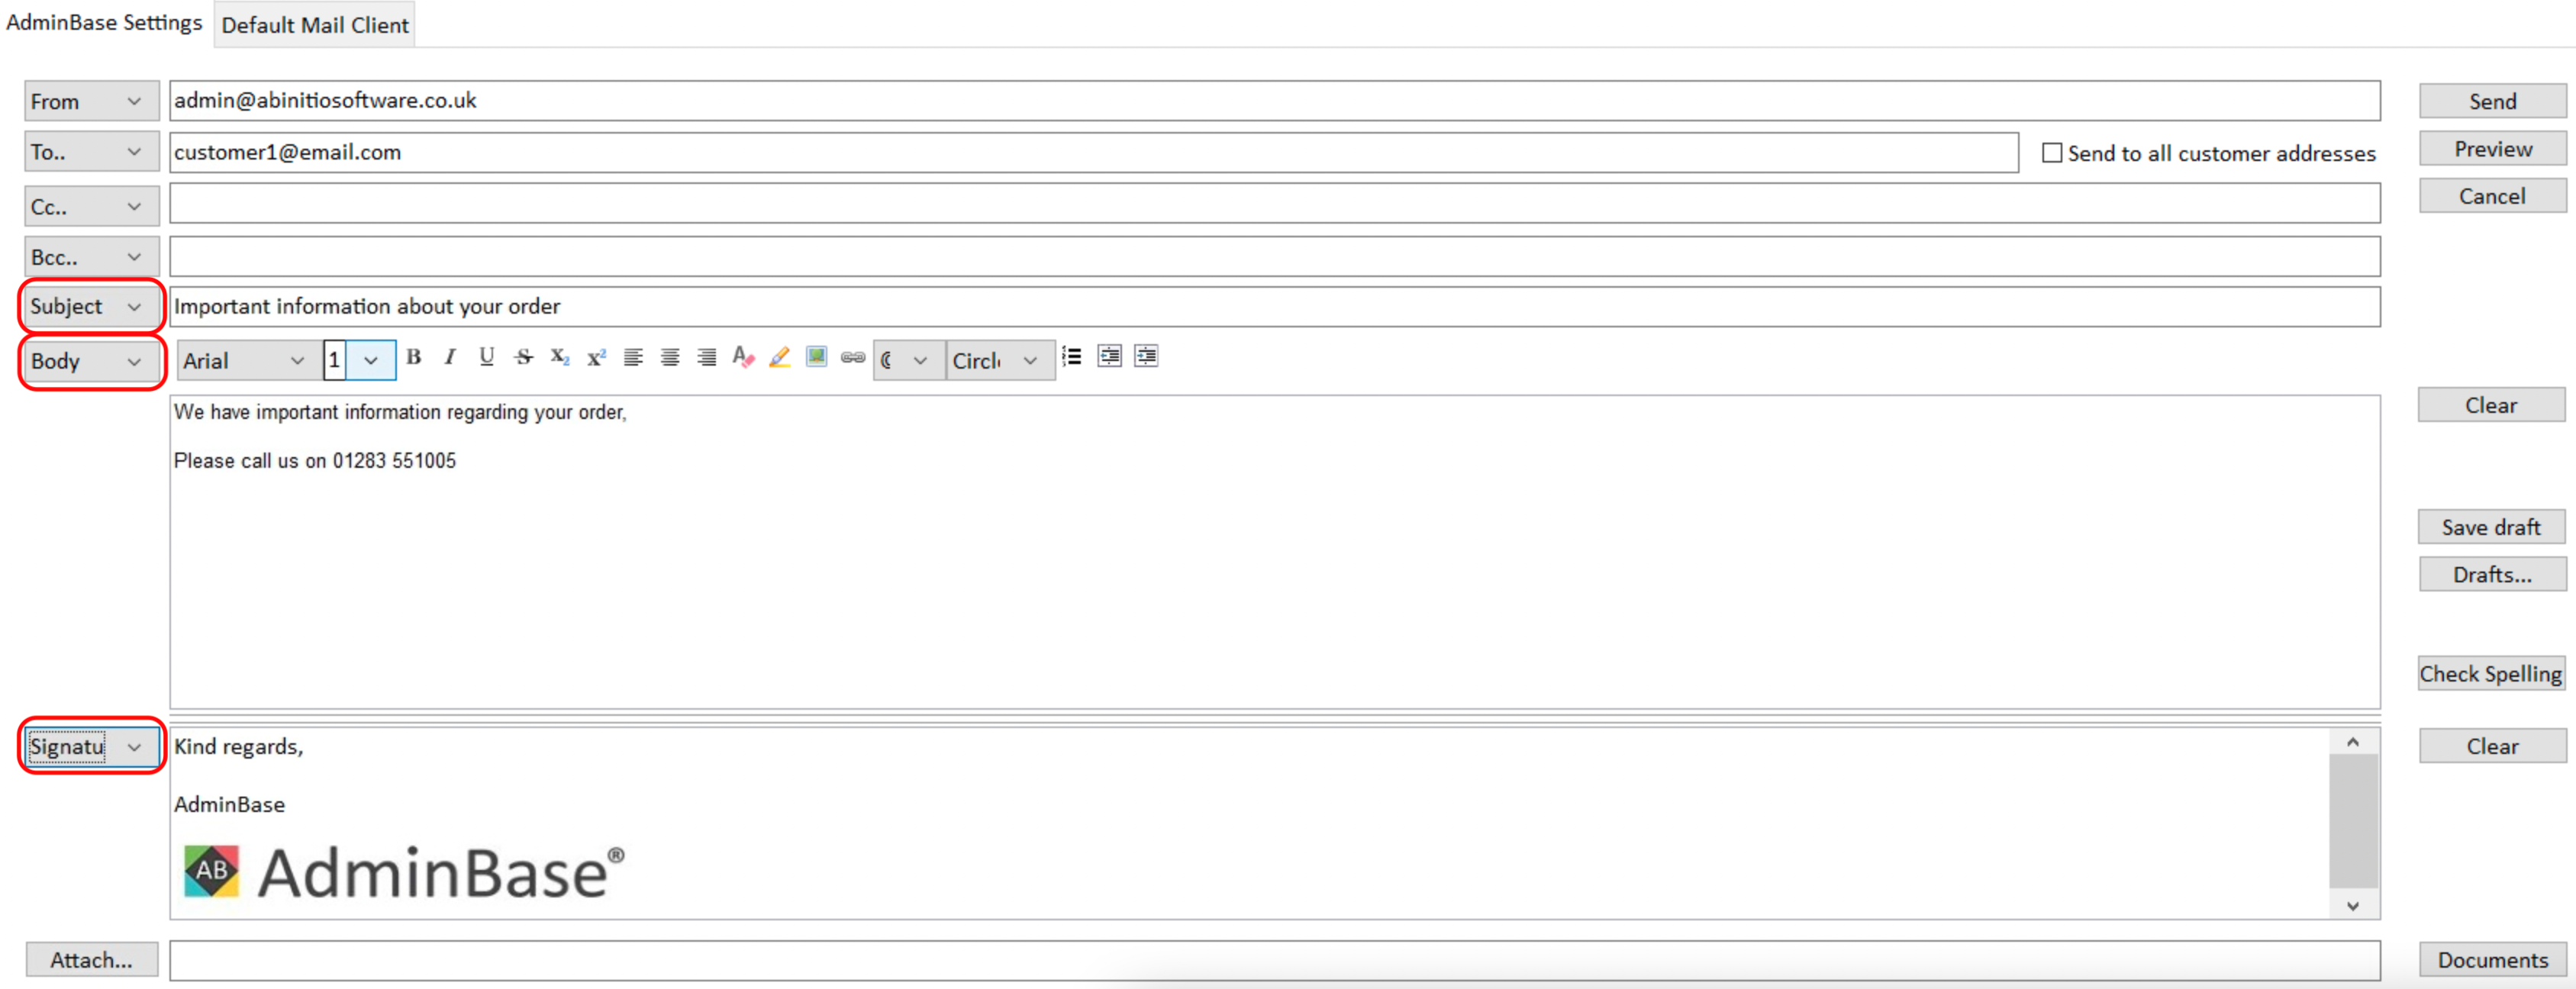
This will then open a blank email composer with the customer email already filled in.

From will be your default From email address in My Settings or you can choose from the list of other company emails.
You can select ad hoc subjects / bodies / signatures and then edit your email further. These ‘snippets’ are set up in Company Settings → Emailing.
As per the above flow chart ad hoc emailing is best for one off emails.
2. Emailing Letters and Form Reports
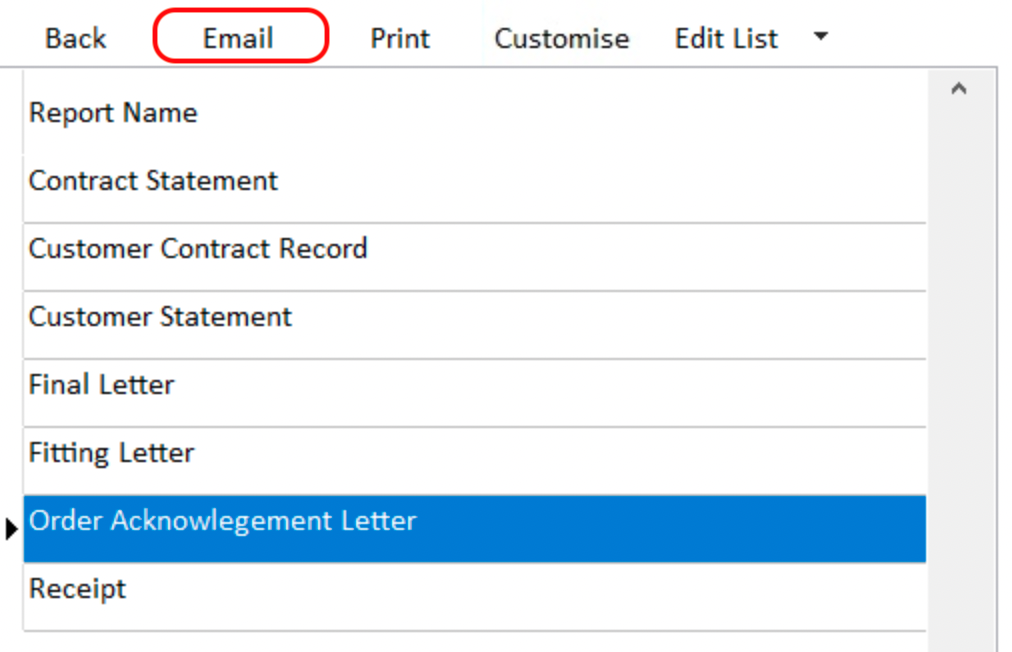
Within a Lead or Contract record, click the Reports button to access customer letters or forms.

Select the report that you would like to send and click the Email button.
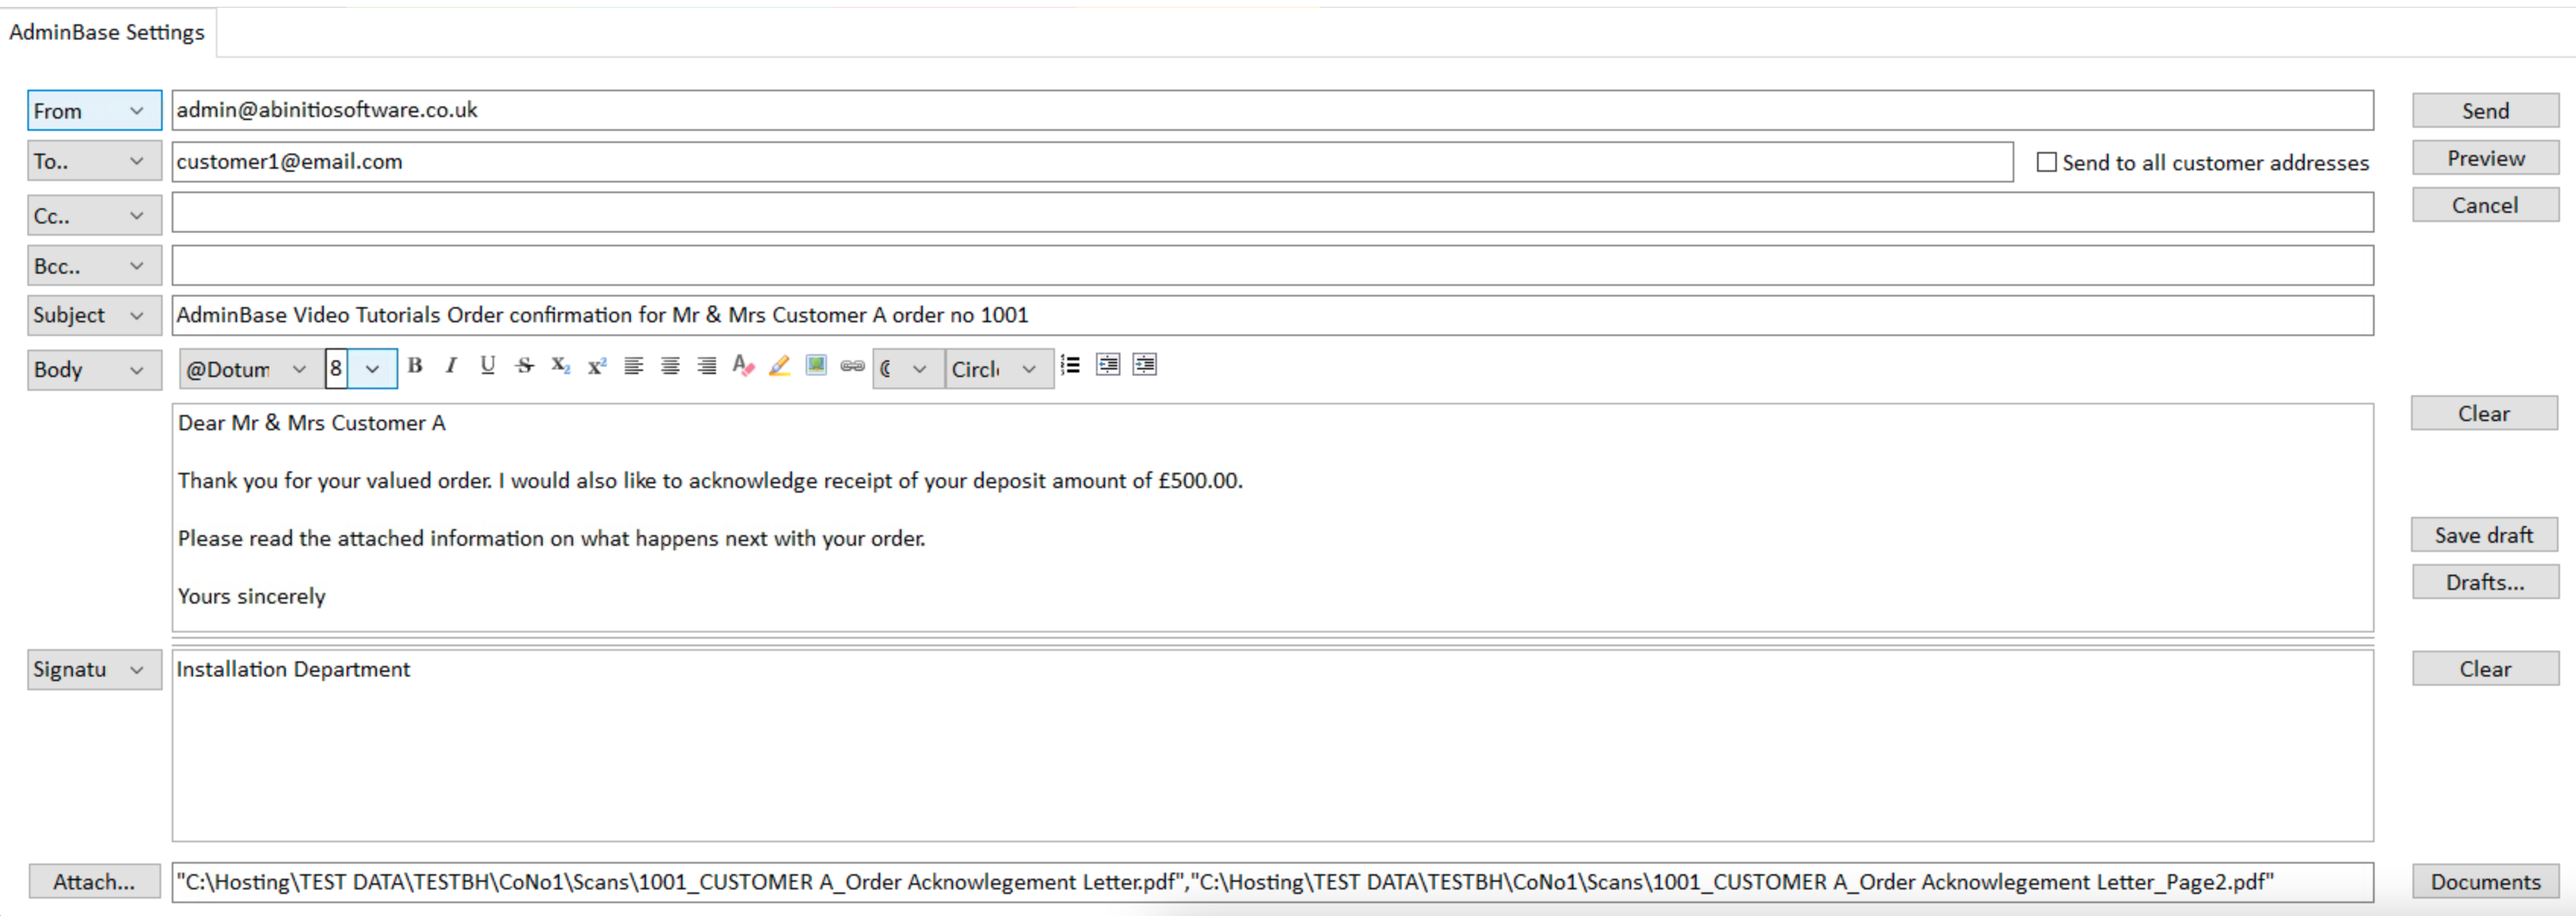
This will then open the email browser where the letter or form has already been attached at the bottom of the compose. If you would prefer the content or details of the letter to be included in the body of the email as well as or instead of an attachment, then you can use an HTML Body with merge fields to construct your email.
Once the From, To, Subject and Signature have been selected, this email can then be sent.
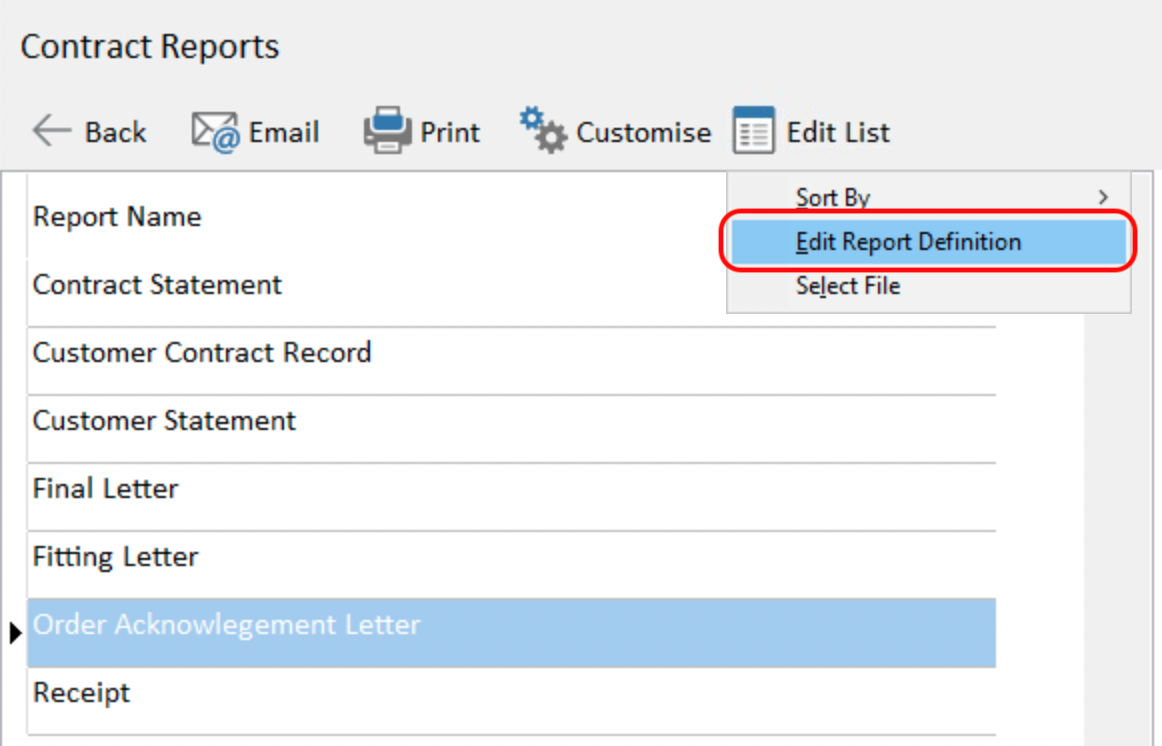
The From, To and Signature can predefined for a specific report by selecting the report, clicking Edit List and then Edit Report Definition
Using the drop down lists you can select default options for this report for the currently selected contract’s type and payment method.
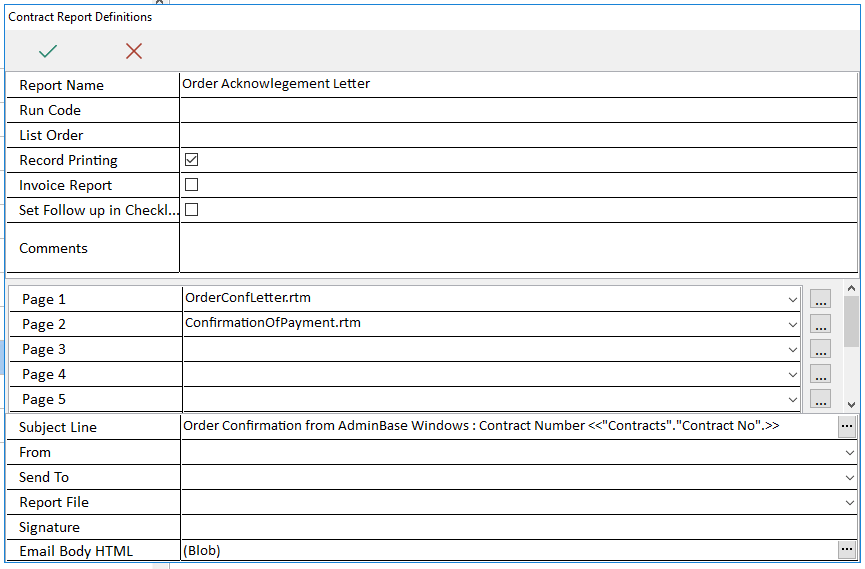
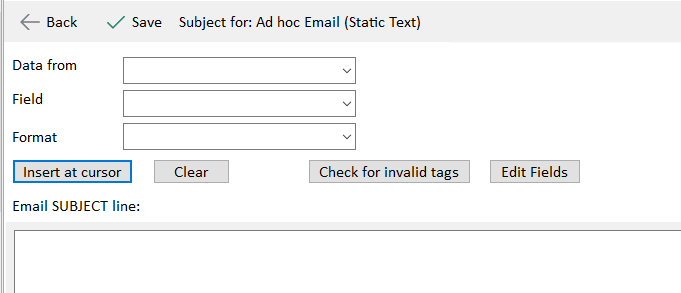
The Subject can be customised to include information from AdminBase fields by clicking the 3 dots within the subject field

If you are setting up all the reports/emails prior to using them you will find it easier to use Company Settings → Contract Type Defaults and from there you can choose each contract type and their reports. Once you have selected the report you wish to setup for emailing you will see the following on the right hand side.
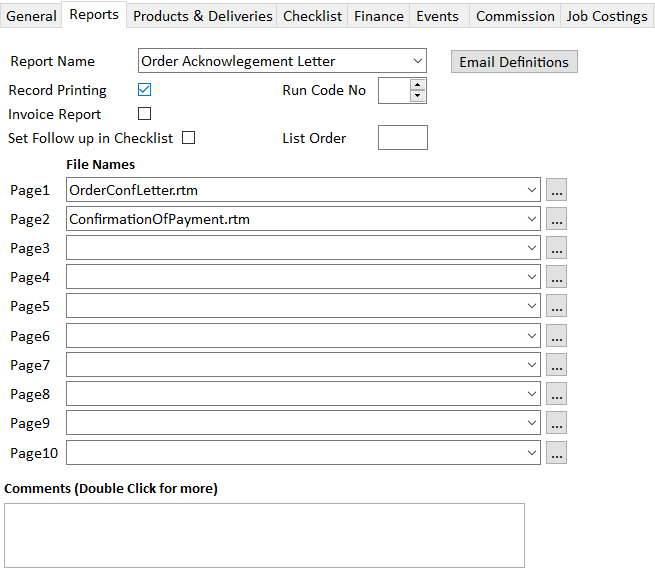
Click on the Email Definitions to access this form.

Note the report file setting is to use a Report Builder template as your email body. We recommend however that you use an HTML body as these are more easily edited when you send the email and display better on mobile phones.
*For more information on how to create a subject and HTML body using AdminBase fields, please see the instructions within the below section on Checklist Notification Emails
3. Checklist Notification Emails
Automatic email notifications can be sent when a checklist action is completed. These notifications can be sent to the customer, salesperson, or installation personnel.

Checklist notifications can be set up when creating a default checklist for an contract type, by navigating to Settings → Company Settings → Contract Defaults and the selecting a contract type. The Checklist tab is where you can set up the actions, due dates and notification for a contract.
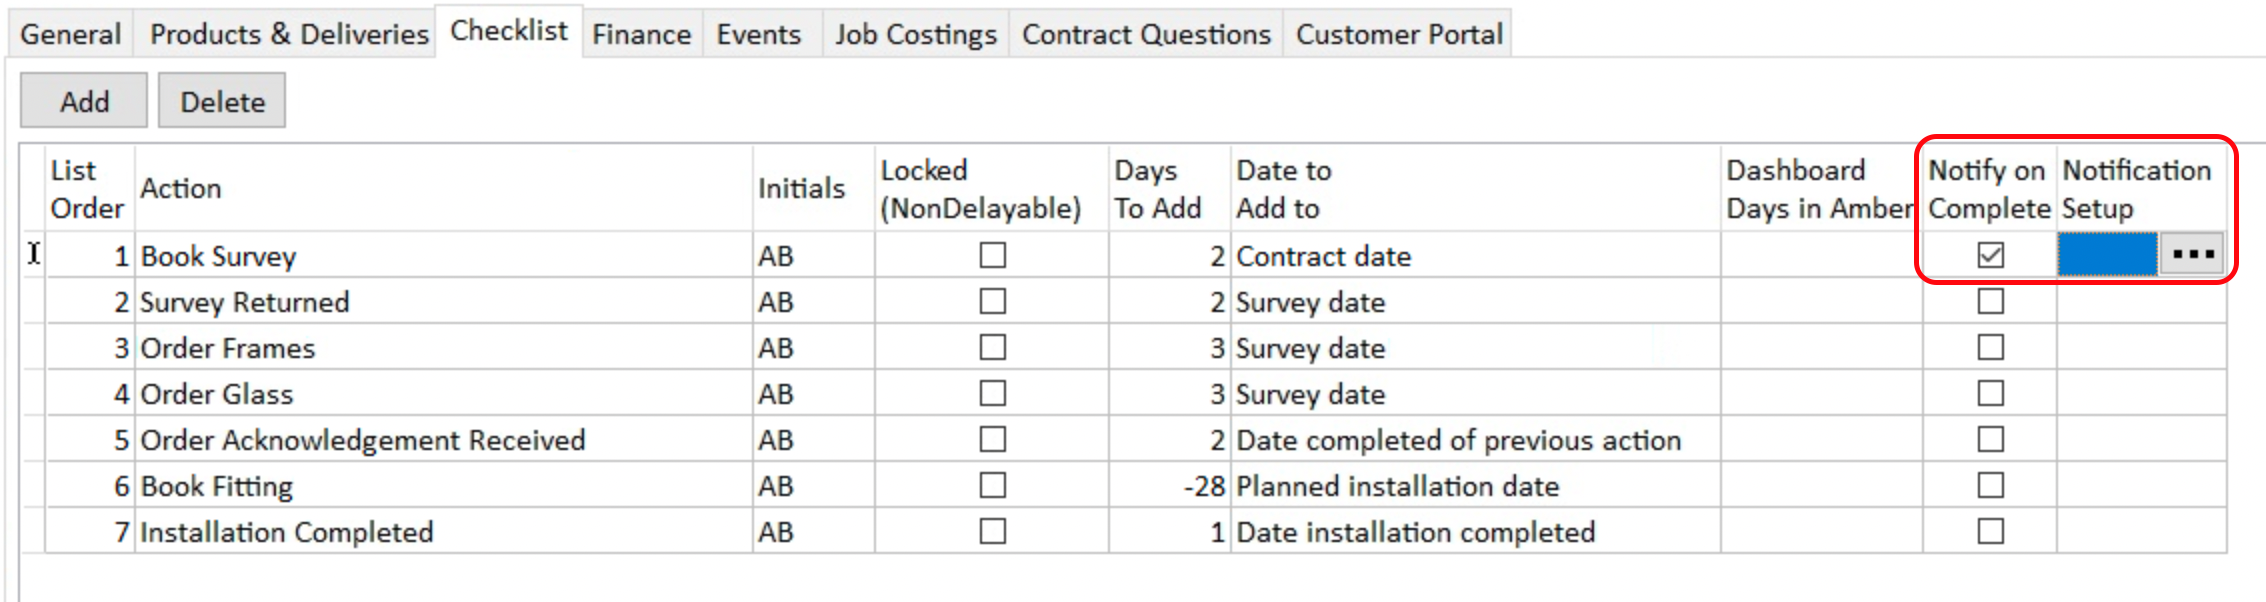
Click the Notify on Complete checkbox to enable notifications for that checklist action.
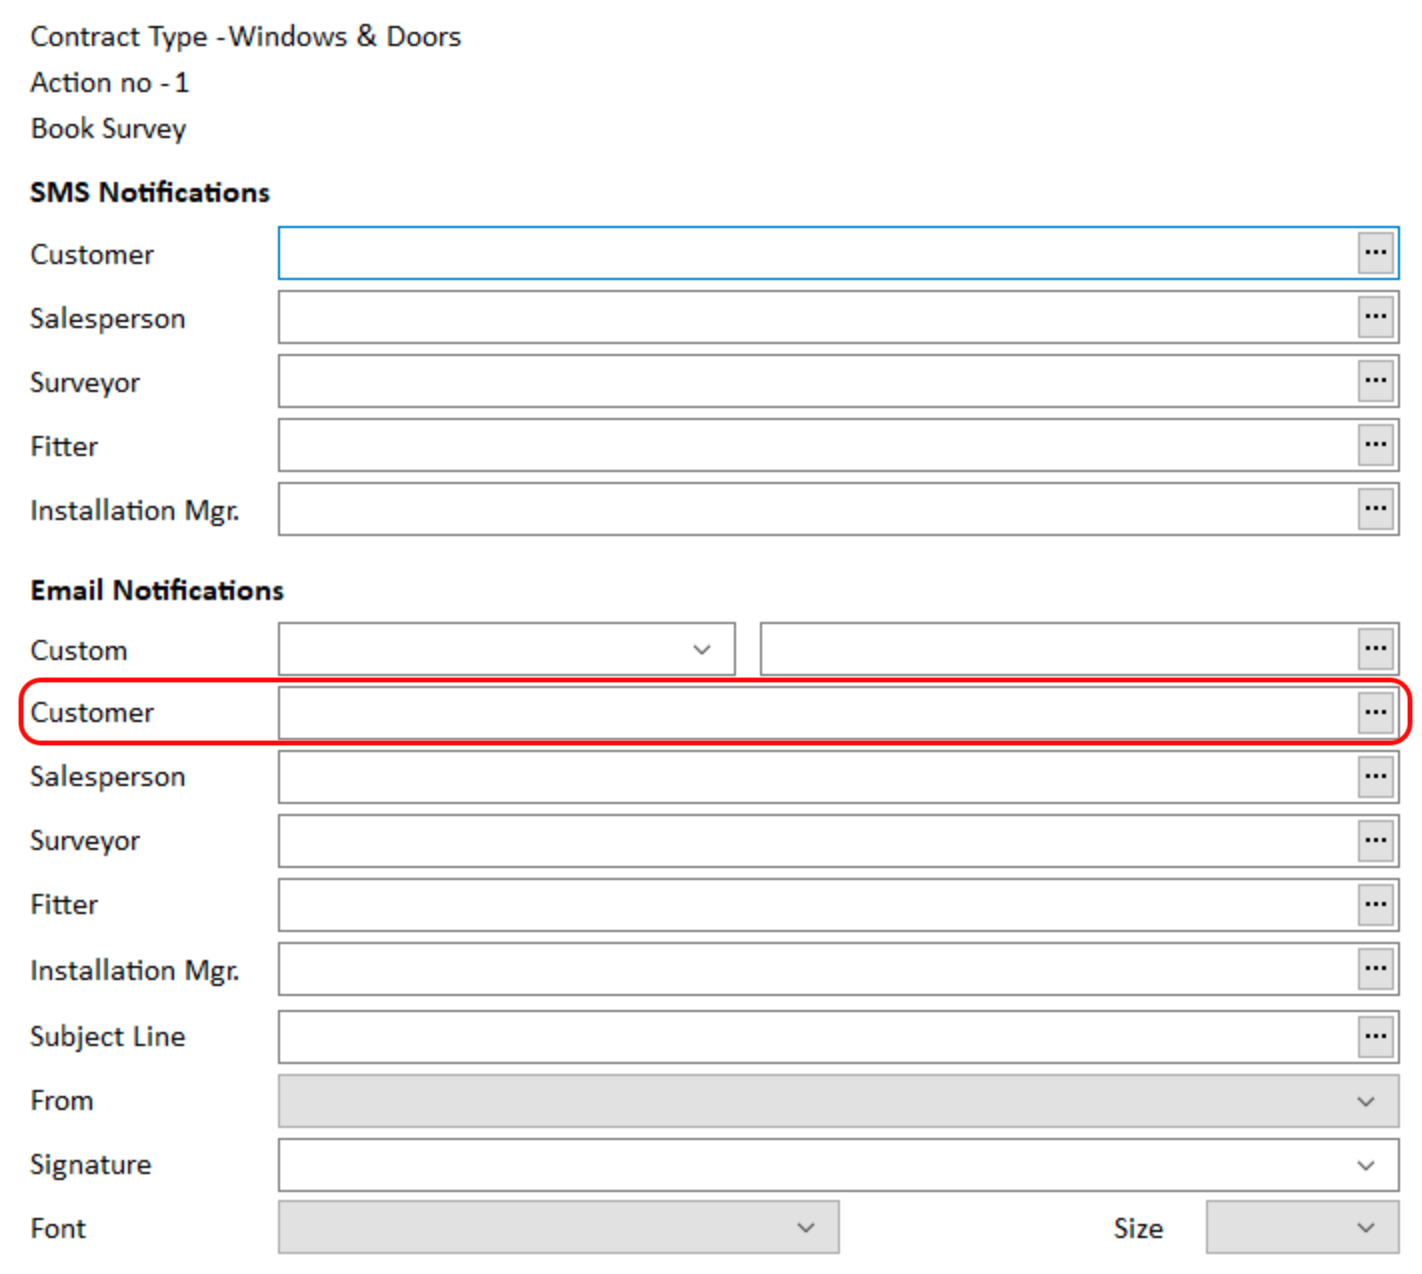
Clicking the 3 dots will take you to the notification setup screen, where you can set up multiple notifications for the same checklist action, including both email and SMS notifications.
Create a new notification message by clicking the 3 dots next to the relevant person
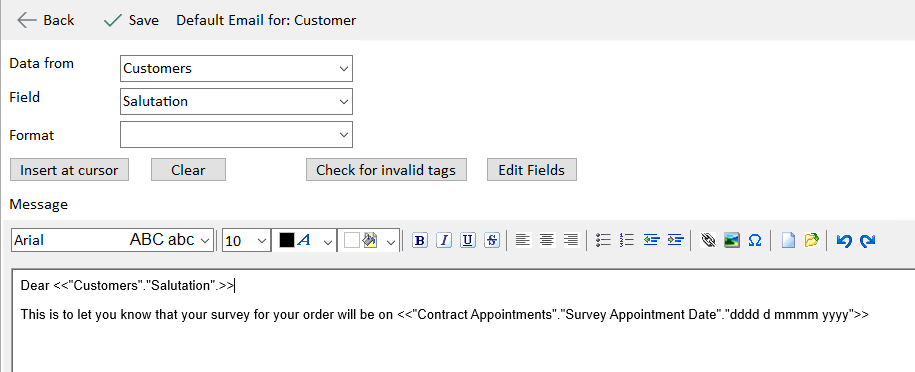
Using a combination of free text and AdminBase fields, create your notification message.
First select the relevant table where the information is store. You can choose from…
Customers - Customer Record
Contracts - Contract Record
Company Details - Company Information (The details found at Company Settings > Company Details)
Contract Appointments - Diary Appointment Details
Contract Values - Contract Financial Information
Once you have selected the table, you can then select a field within that table. If required, you need to select the format to display this information. (e.g. For the Appointment Date you can can choose D/M/Y, DD/MM/YY, DDD D MMM YYYY or DDDD D MMMM YYYY)
Once you have selected the relevant Table, Field and Format, click Insert at cursor
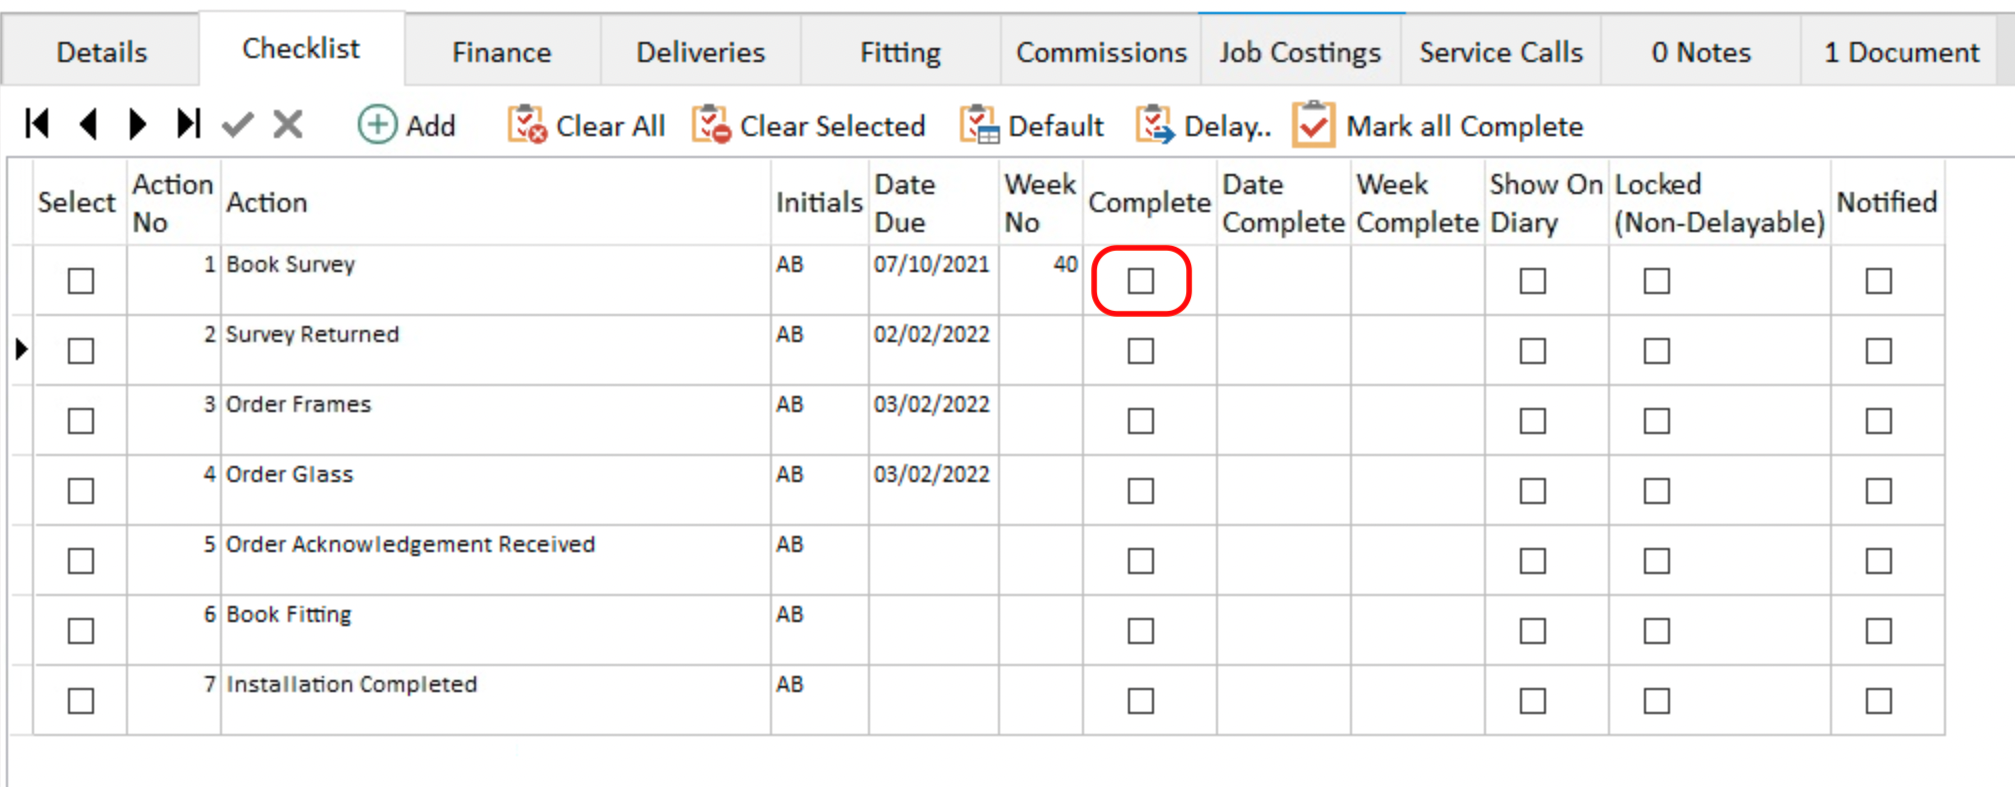
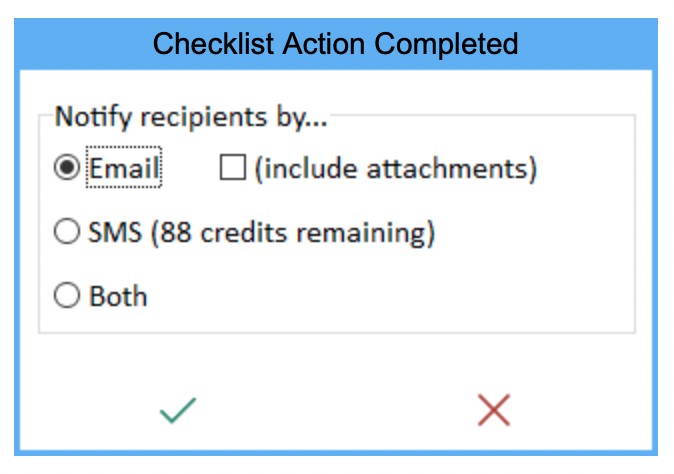
Back within the contract record, once the Complete checkbox had been ticked, a popup will appear asking if you would like to send a notification by Email, SMS or both. This will then send the notification to the relevant person/people
4. Emailing from the Diary
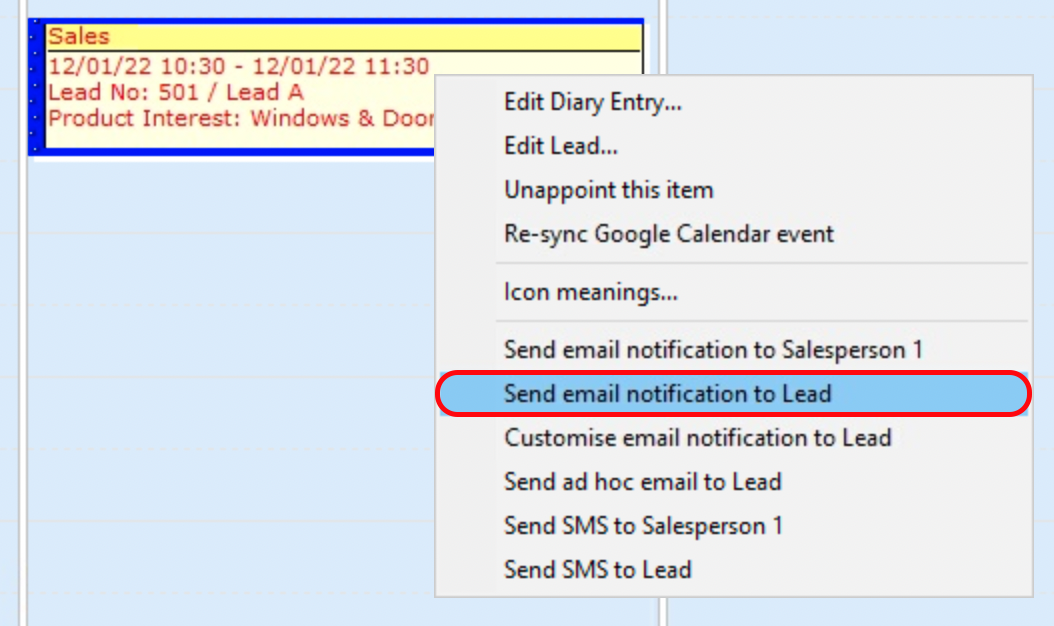
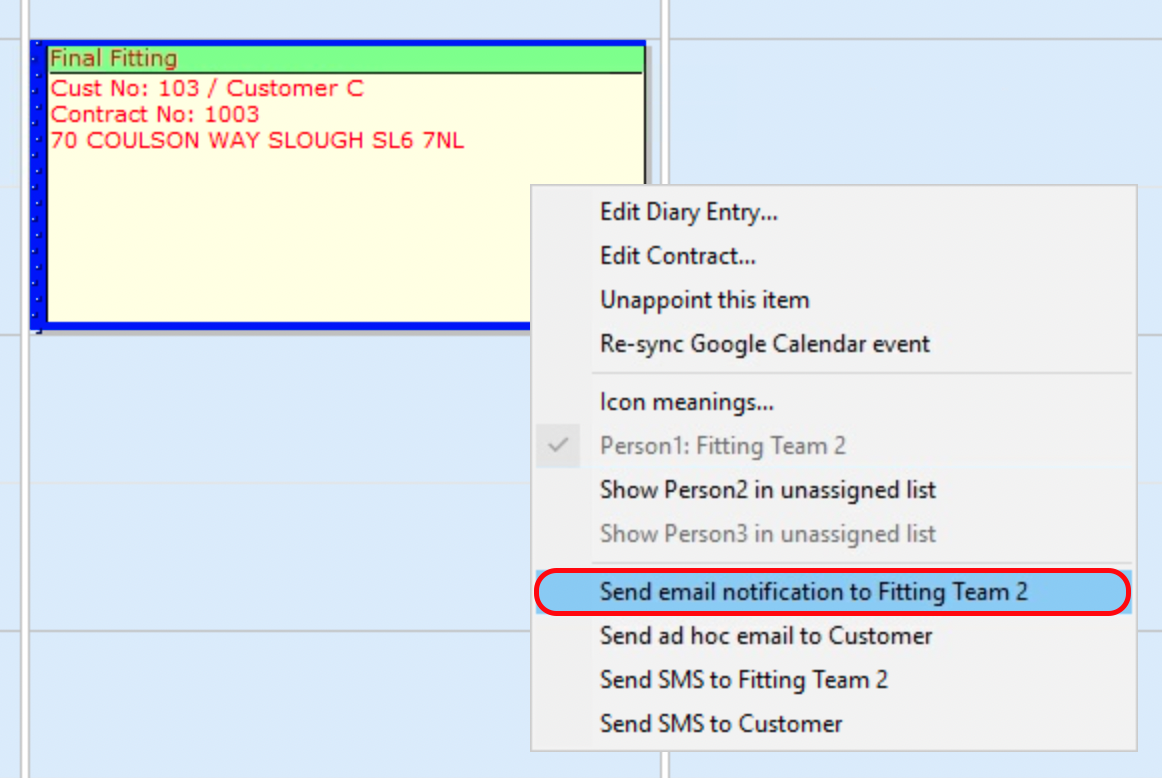
Within the AdminBase diary, you can send send an email directly to a customer or staff member. Right click on the appointment, and choose one of the emailing options. To send an appointment confirmation to the customer, right click and select Send email notification to Lead.
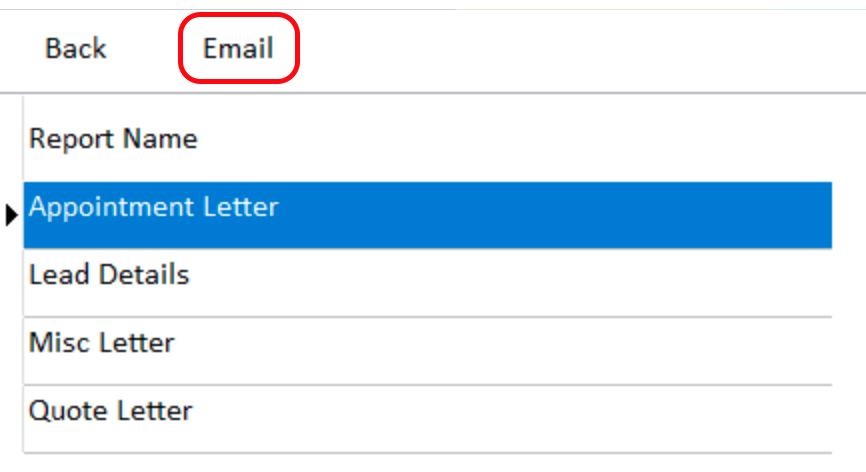
Select the Appointment Letter report and click Email.
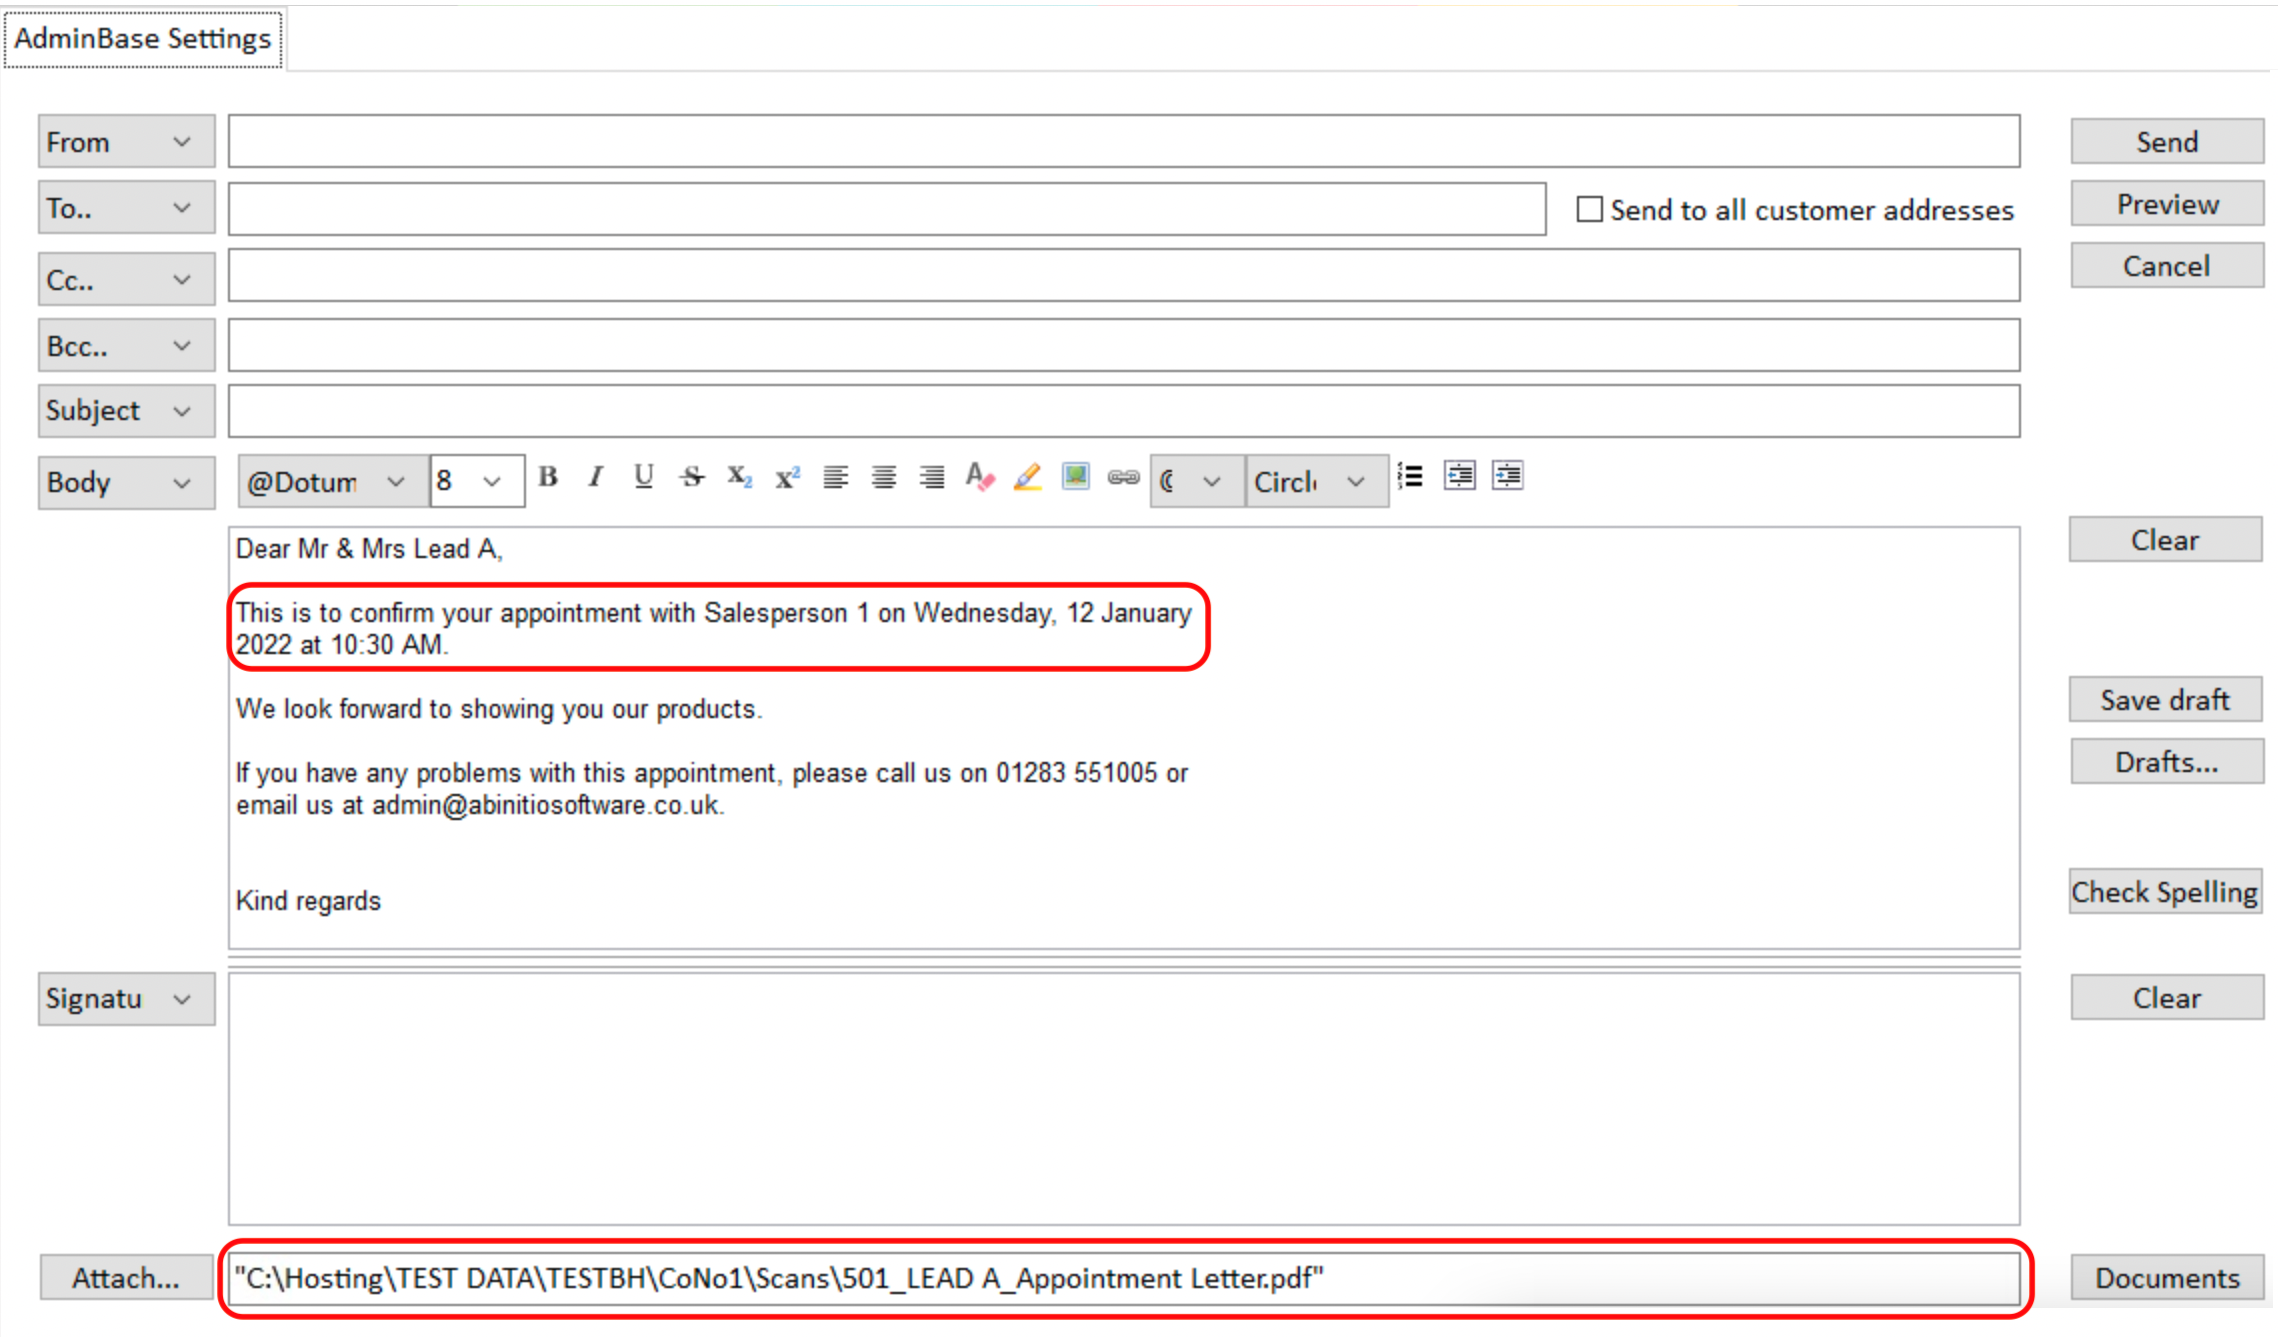
This will then open the email composer with the details of the appointment already included in the body of the email, along with the appointment letter included as an attachment.
Emailing Staff
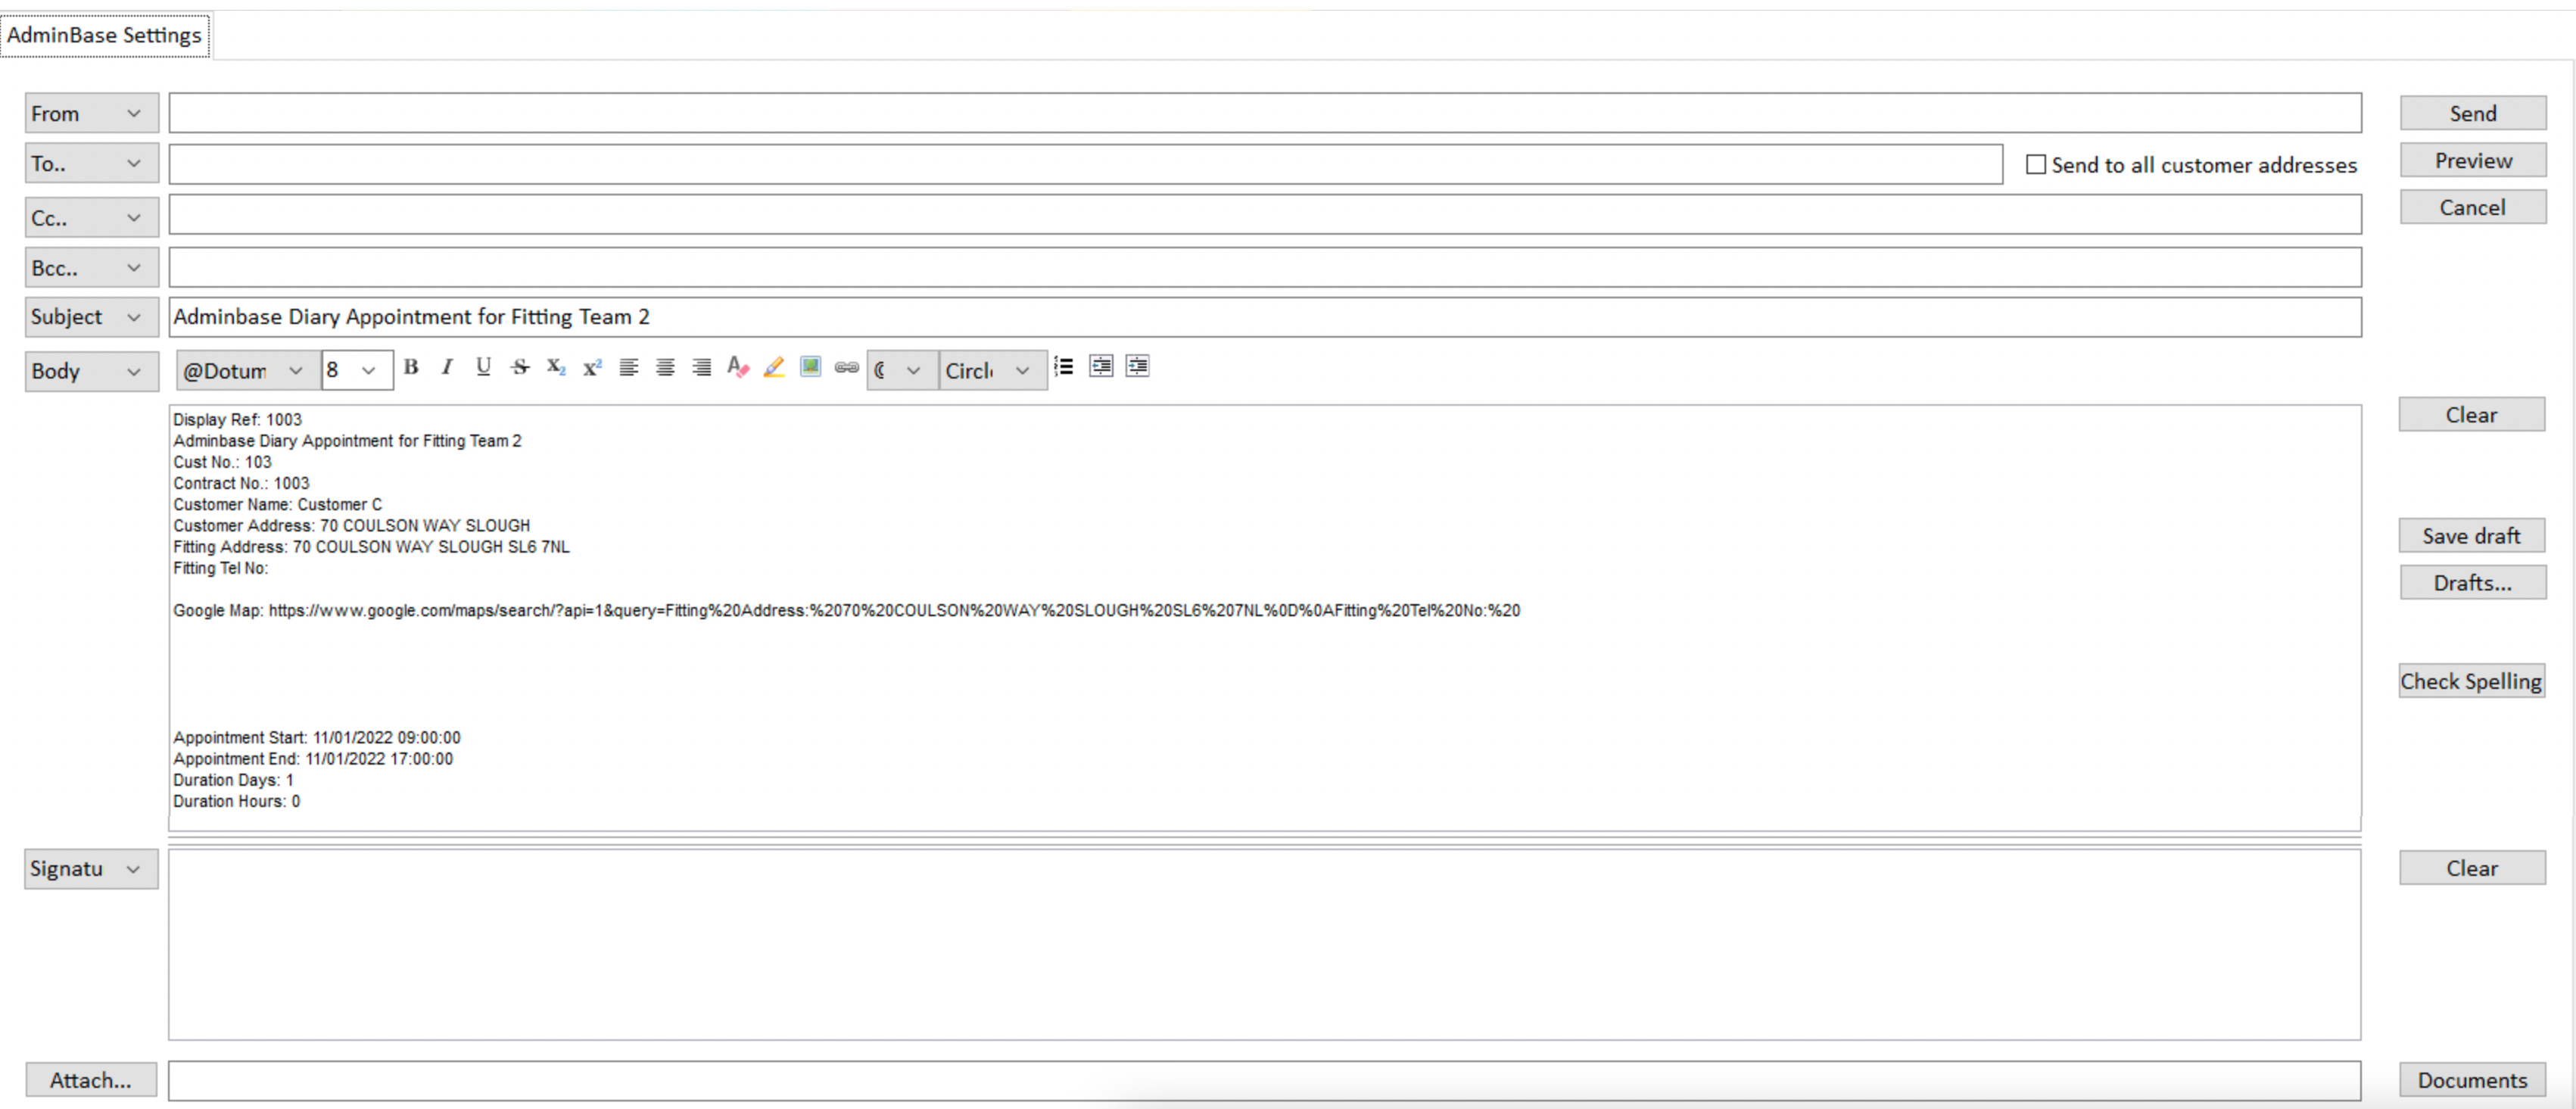
Appointment information can also be sent to staff members. Right click on the appointment within the diary, and select Send email notification to Salesperson / Personnel.
This will then open the email composer with the details of the appointment already included in the body of the email, along with a link to open the address within google maps.
5. Email Settings
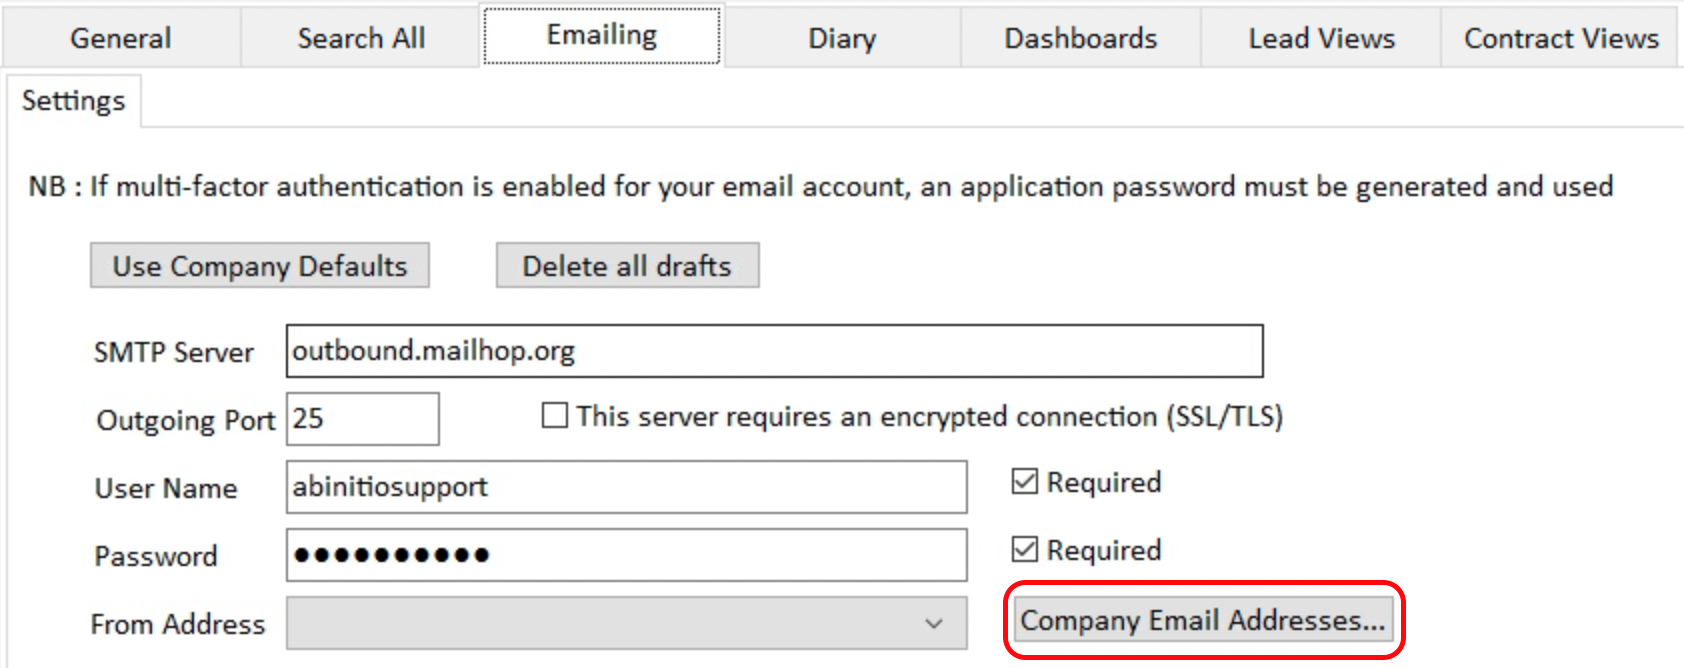
Email settings can be accessed by navigating to Settings → My Settings → Emailing
The default server, username, and password settings should already be entered. If these are blank, please contact AdminBase Support.
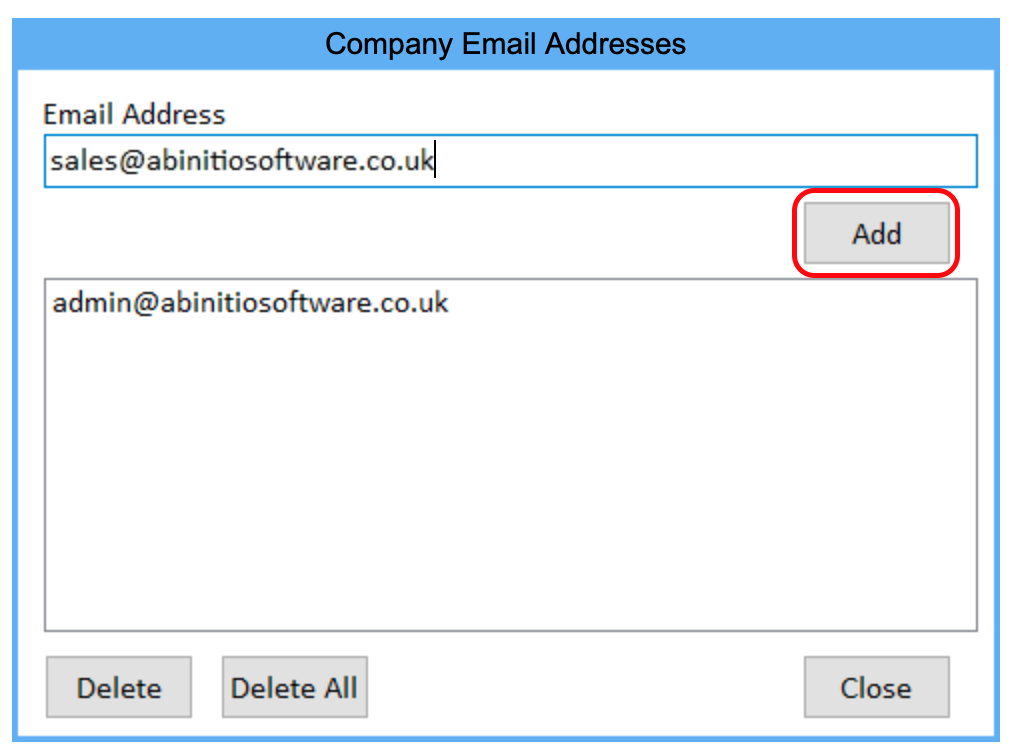
You can set up your company email addresses to send emails from by clicking on the From Address field.
Enter the email addresses that you would like to include and click Add. Then select a default from address from the list you have just created.
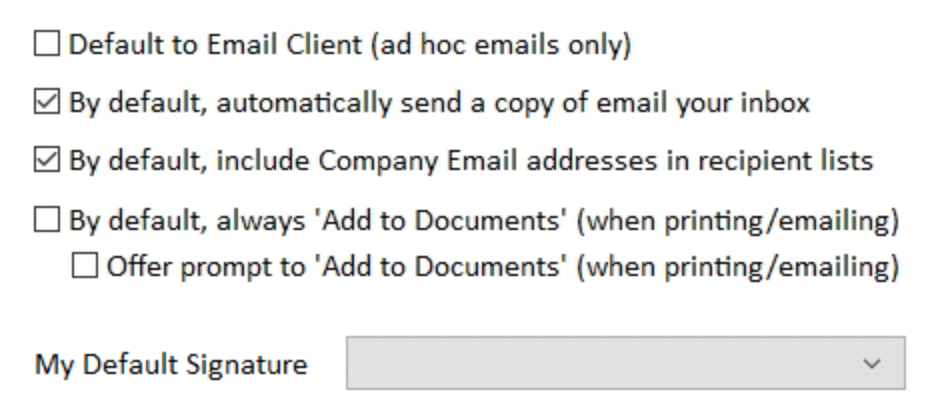
Further settings can be customised within this tab. You can choose to...
Have ad hoc emails be composed in your default email client rather than AdminBase
Automatically have a copy of all emails you send forwarded to your inbox
Include your company email address in the recipient list (This email address can be added by going to Company Settings → Company Details tab)
When printing or emailing letters, either prompt or automatically add this file to the documents tab within the lead or contract record
You can also select the default signature to be used for this user
6. Subject / Body / Signatures Setup
Default subjects, email bodies and signatures can also be set up so you can select these within the email composer.
To create these, navigate to Settings → Company Settings → Emailing → Subject / Body / Signature
To create a new subject, click Add New and type the subject within the box.
To create a new body, click Add New and give the new body a name, and create the body using the text box.
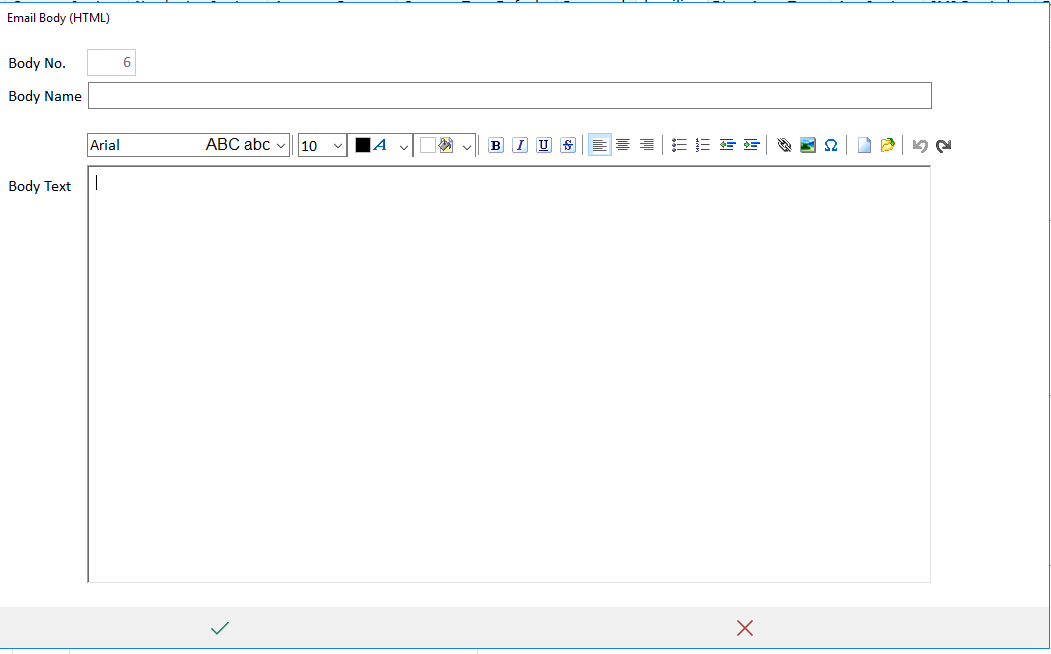
Ad hoc emails have no merge fields as they can be created from anywhere. If you want to create an email body that contains AdminBase data see section 2. above.
To create a new signature, click Add New and then click Add. Alternatively you can overtype and existing signature.
Once you have named the signature, double click within the Signature Text field to add the text based part of the signature.
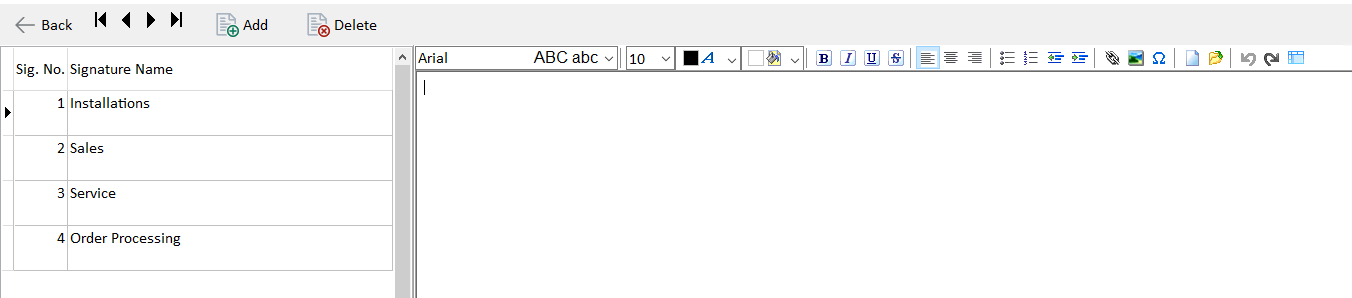
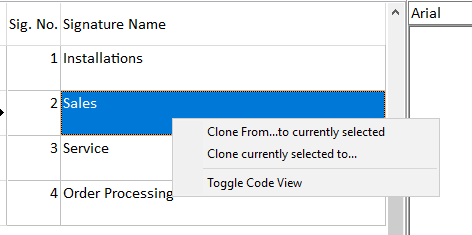
Right clicking a signature allows you to copy signatures and view the Html code
The next time you compose an email, you can select the default subject, body and signature from the relevant drop down fields