SMS Instructions
Setup
To make use of the SMS sending functionality from within AdminBase, the following will be required :-
In Settings → Company Settings → Passwords make sure that the SMS Password is entered.
Purchase SMS credits from the Ab Initio Shop https://support.abinitiosoftware.co.uk/#!/shop

Sending SMS Messages
Individual SMS messages can be sent from various locations within AdminBase. There is also the facility to do a Batch Send.
Sending Individual Messages
The following locations within AdminBase allow the sending of an SMS message:
An event within any of the diaries
A Salesperson's record
A Personnel record
A line in either the Lead or Contract Browsers
From a Diary Event
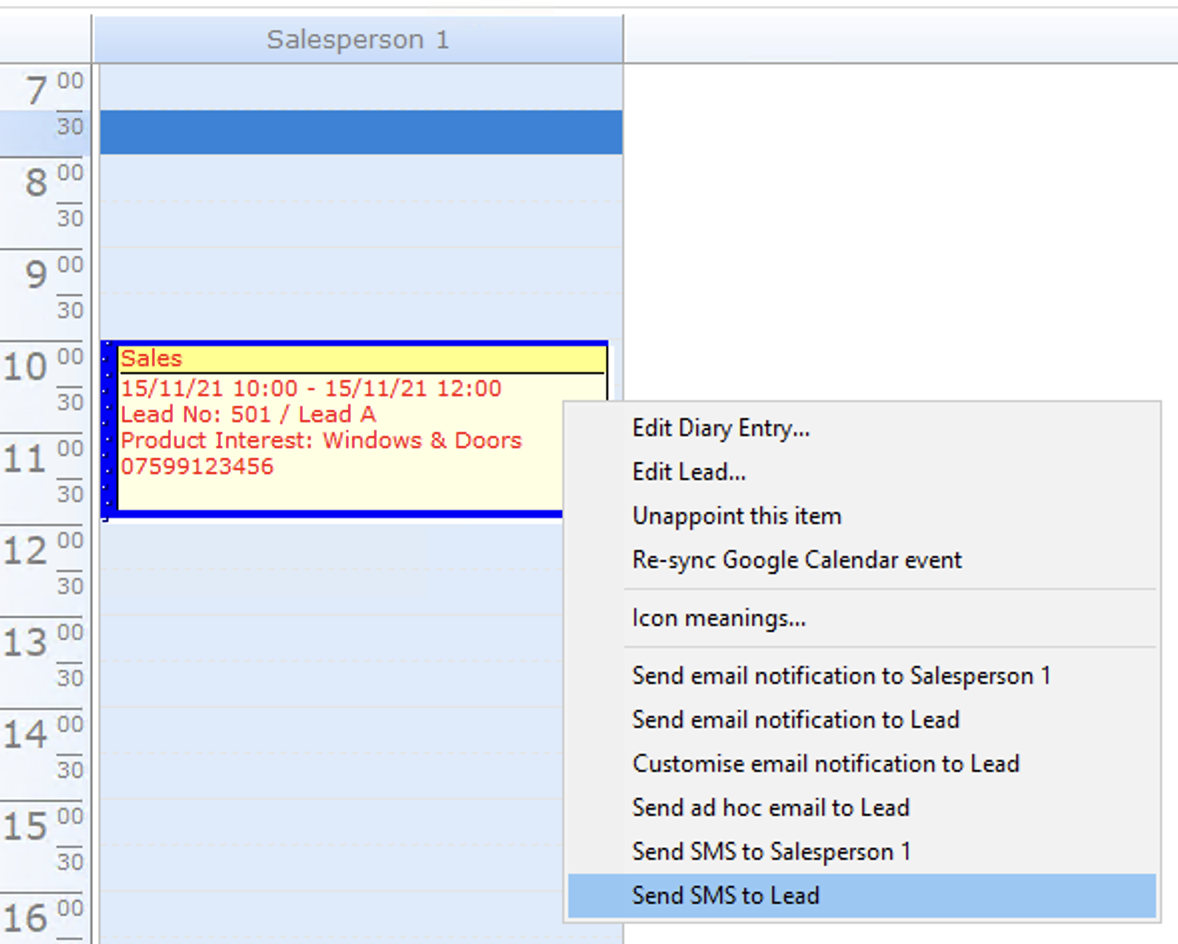
1.ITo send an SMS message from a diary event, right-click on the item to summon the context menu.
2. From here the user can choose to send SMS to the Lead/customer etc. or to the Salesperson/Personnel etc. (As shown below).
3. Clicking ‘Send SMS to...’ brings up the ‘New SMS’ dialog (As shown below) which will already be populated with data depending on the recipient selection just made.
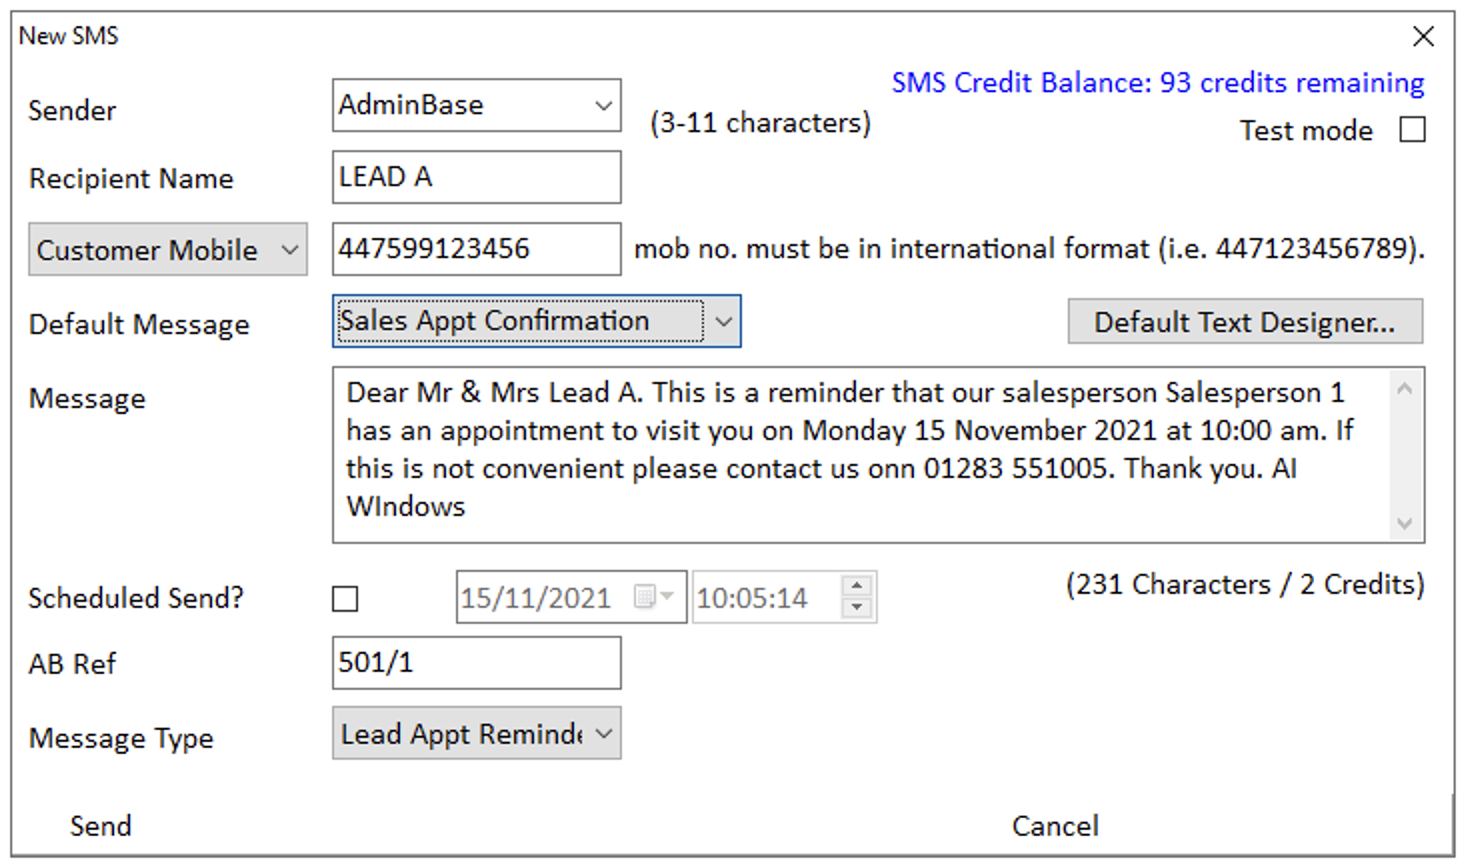
Sender | Use this field to specify the sender name for your message. This must also be at least 3 characters in length but no longer that 13 characters. |
|---|---|
Recipient Name | Name of person message is being sent to. |
Mobile No. | Numbers already stored in AdminBase will automatically be formatted correctly. However the user should make sure that any mobile number entered manually is in the correct format. NOTE: The recipient's mobile number must be in the international format (eg. 07792 123456 would be 447792123456). |
Default Message | The user can type a message manually or choose from a selection of predefined default messages (accessed via ‘Default Text Designer’ button, see ‘SMS Message Defaults’ below). |
Schedule Send? | Leave unchecked to send SMS immediately or check the box and specify a scheduled send date/time.  |
AB Ref & Message Type | Automatically populated by AdminBase for later retrieval/viewing of SMS messages and their status. |
From a Salesperson’s Record
To send an SMS message from a salesperson's record, select Settings → Salespeople → Choose a Salesperson → Edit → SMS tab. Click on the New SMS button.
From a Personnel Record
To send an SMS message from a personnel record, select Settings → Personnel → Choose a person → SMS tab. Click on the New SMS button.
Sending a Batch of SMS Messages
AdminBase can batch-send SMS messages to everyone in a current 'browser view'.
1.IFirst of all you need to set (and filter) a view in either a Leads, Customers or Contracts browser. From Advanced → Batching → select SMS. If the browser view contains a very large number of records, a warning will be displayed. (As shown below).
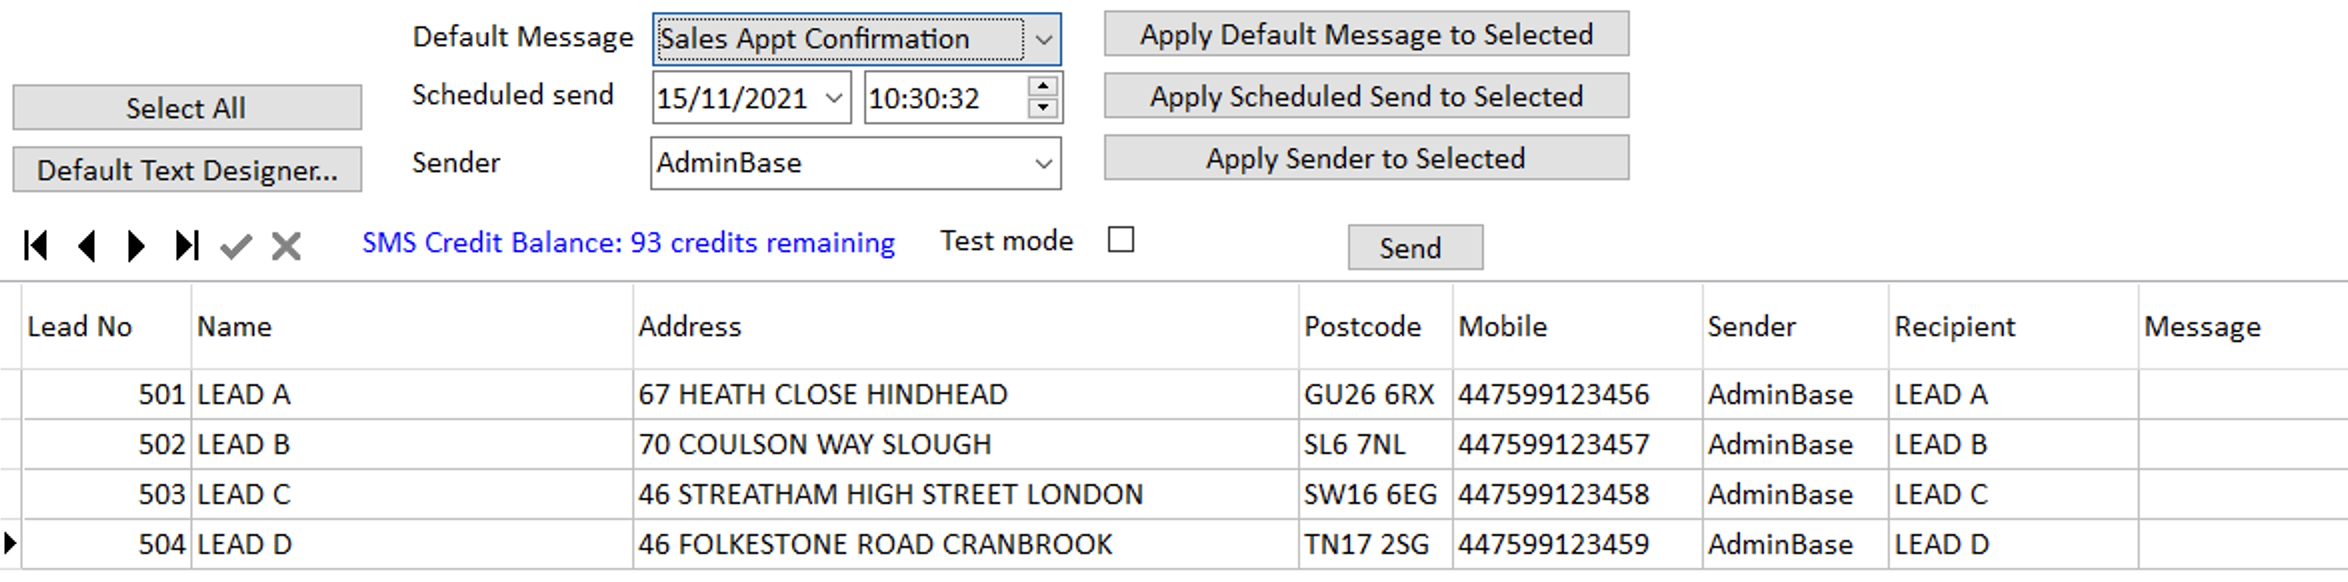
2. This Batch SMS window will be populated with all of the records in the current browser view.
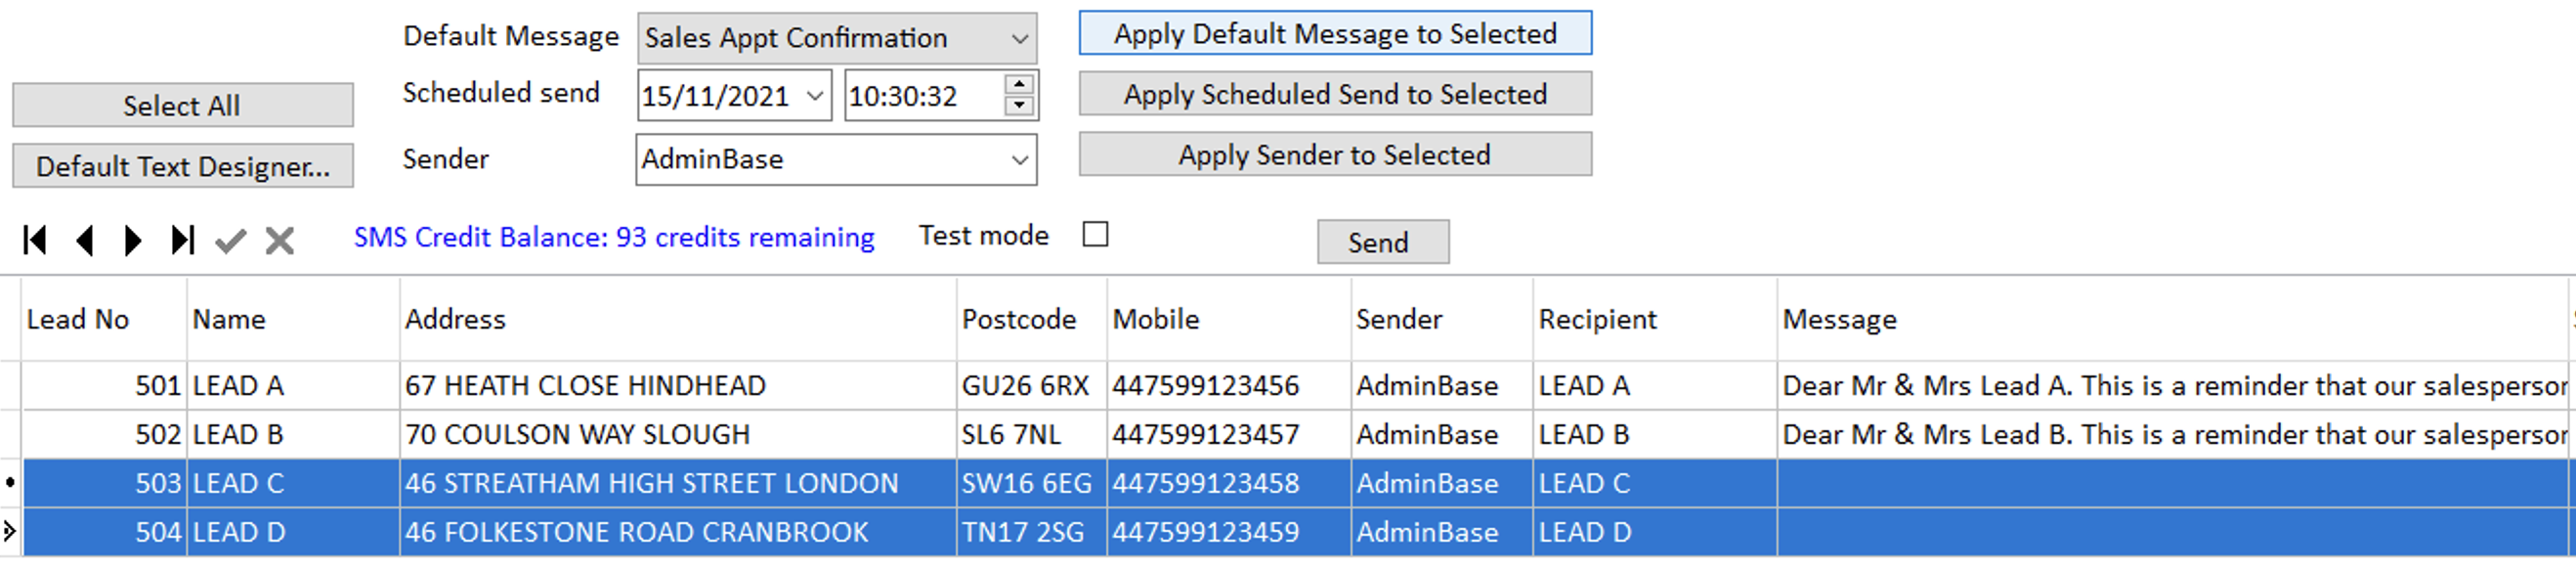
3. The user can apply defaults for an SMS message to selected records or all of the records in this window. Clicking any of the buttons will apply the associated data to selected records.
4. Also the user can double-click on any record to manually edit the fields for that record including recipient mobile number and message text etc.
SMS Message Defaults
Default SMS messages can be defined which can use a combination of 'free text' and database data similar to the way the ReportBuilder works.
1.IClicking the ‘Default Text Designer’ button brings up a form (As shown below).

NOTE: Any number of defaults can be entered here.
2. Description is what will appear in the drop-down list when selecting a Message Default to be sent.
3. To actually design the default so that it can ‘pull' data from AdminBase, double-click on the desired record to open the 'SMS Default Text Designer’. (As shown below).
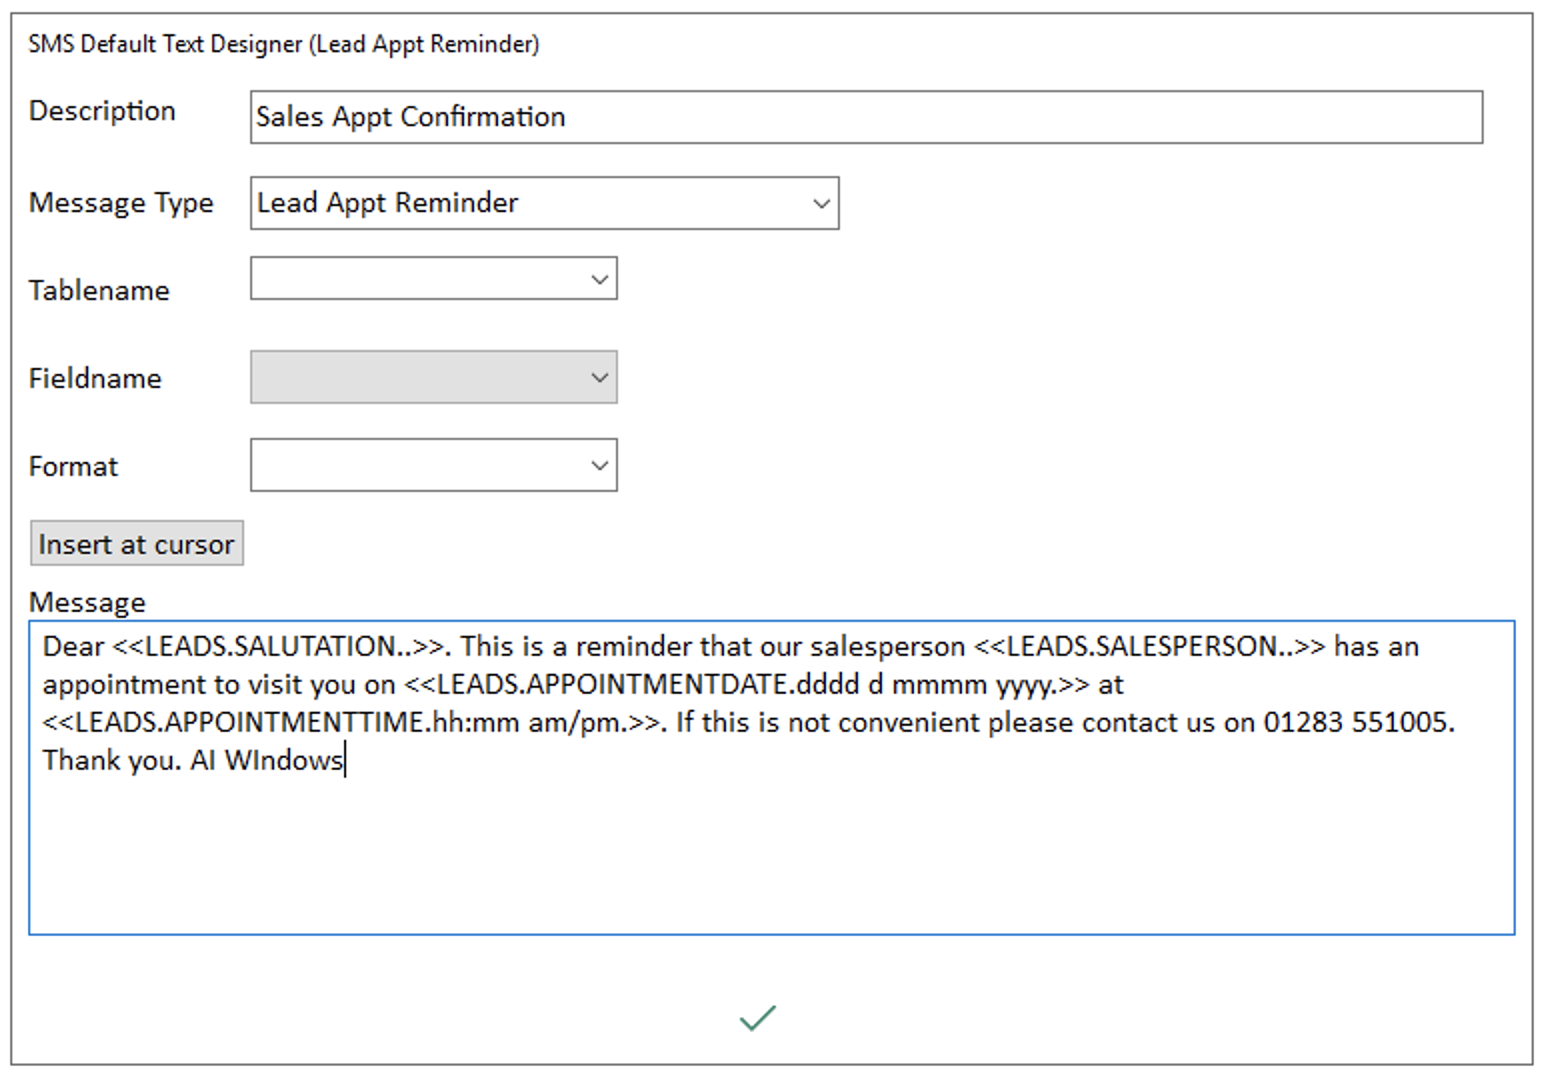
4. From here you can build the default by typing in free-text in the ‘Message’ section.
5. Data can be pulled from AdminBase by choosing a ‘Tablename’, ‘Fieldname’ and ‘Format’, placing the cursor at the desired position in the message and clicking the Insert at cursor button.
6. As shown above, the data strings will automatically be enclosed by << and >> which AdminBase will use when parsing the default to construct the actual text that will be sent to the recipient.
7. Once the defaults have been built they can be applied to selected messages by using the Default Message drop-down. AdminBase will then create the message text to be sent (As shown below).

8. Specify a message type for each of the records by choosing from the Default Message drop-down list and click Apply Default Message to Selected (As shown below). This allows you to select a default when creating an SMS message.
Viewing SMS Message History
A history of messages sent can be accessed from within AdminBase at the following locations:
A Salesperson's Record (SMS tab)
A Personnel Record (SMS tab)
Lead Record (Notes tab > SMS tab)
Customer Record (SMS tab)
Contract Record (Notes tab > SMS tab)
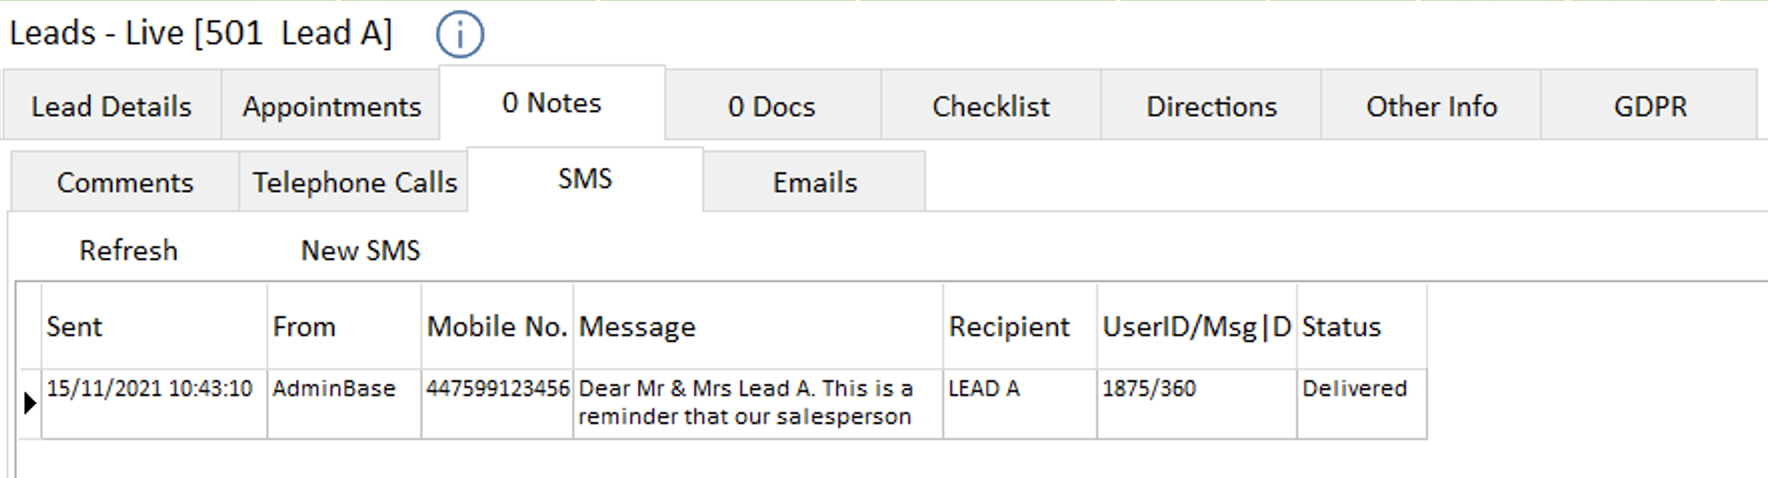
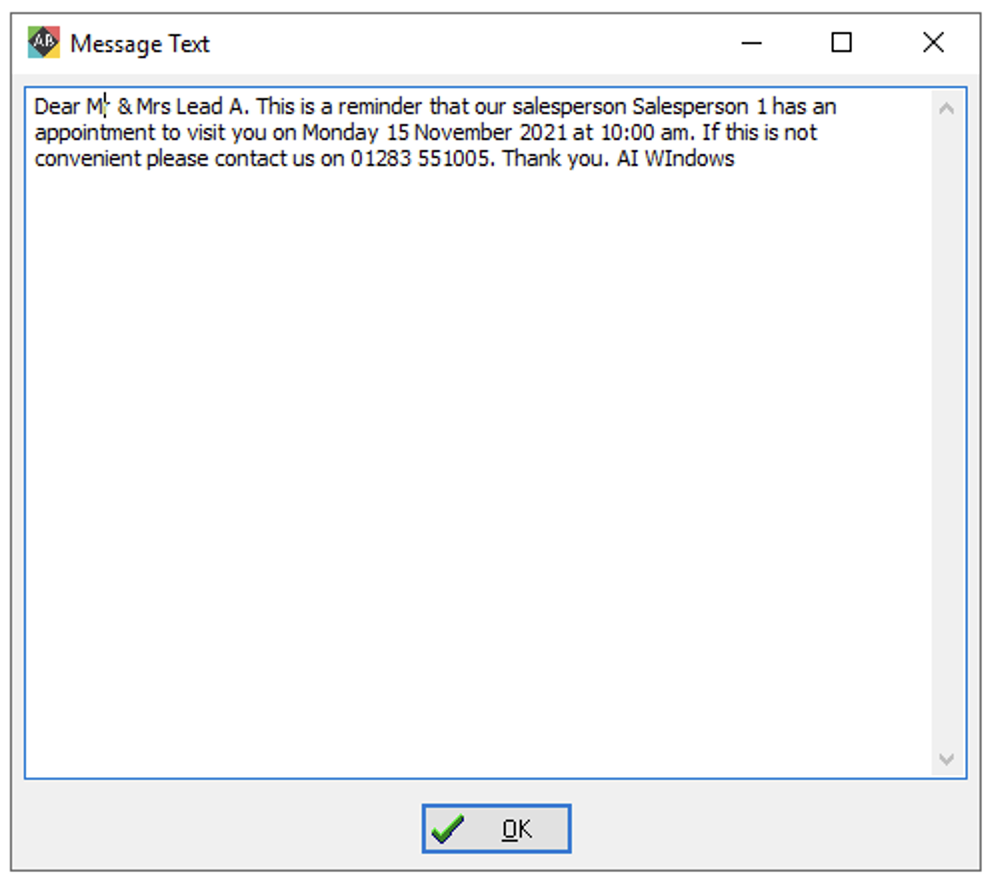
1.IClicking on the 'Message' text brings up a detail window. (As shown below).
NOTE:
Status, the status of the message (New, sent, delivered etc.)
Credits, the number of credits used to send this message based on the following table.
Character Count | Credits Used |
|---|---|
<= 160 | 1 Credit |
> 160 | 2 Credits |
> 306 | 3 Credits |
> 459 | 4 Credits |
> 612 | 5 Credits |
> 766 | This will return an error response as 766 characters is the longest message you can send. |
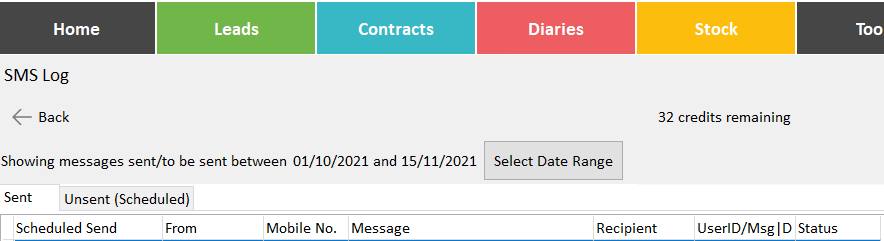
You can also see a list of all messages in Tools → SMS Logs → Enter a date range of messages. If you have scheduled a message that you need to delete click on the Unsent tab to find and delete.