AdminBase Task Board
Applies to versions 2022.11.14.1 and after using AdminBase via a web browser
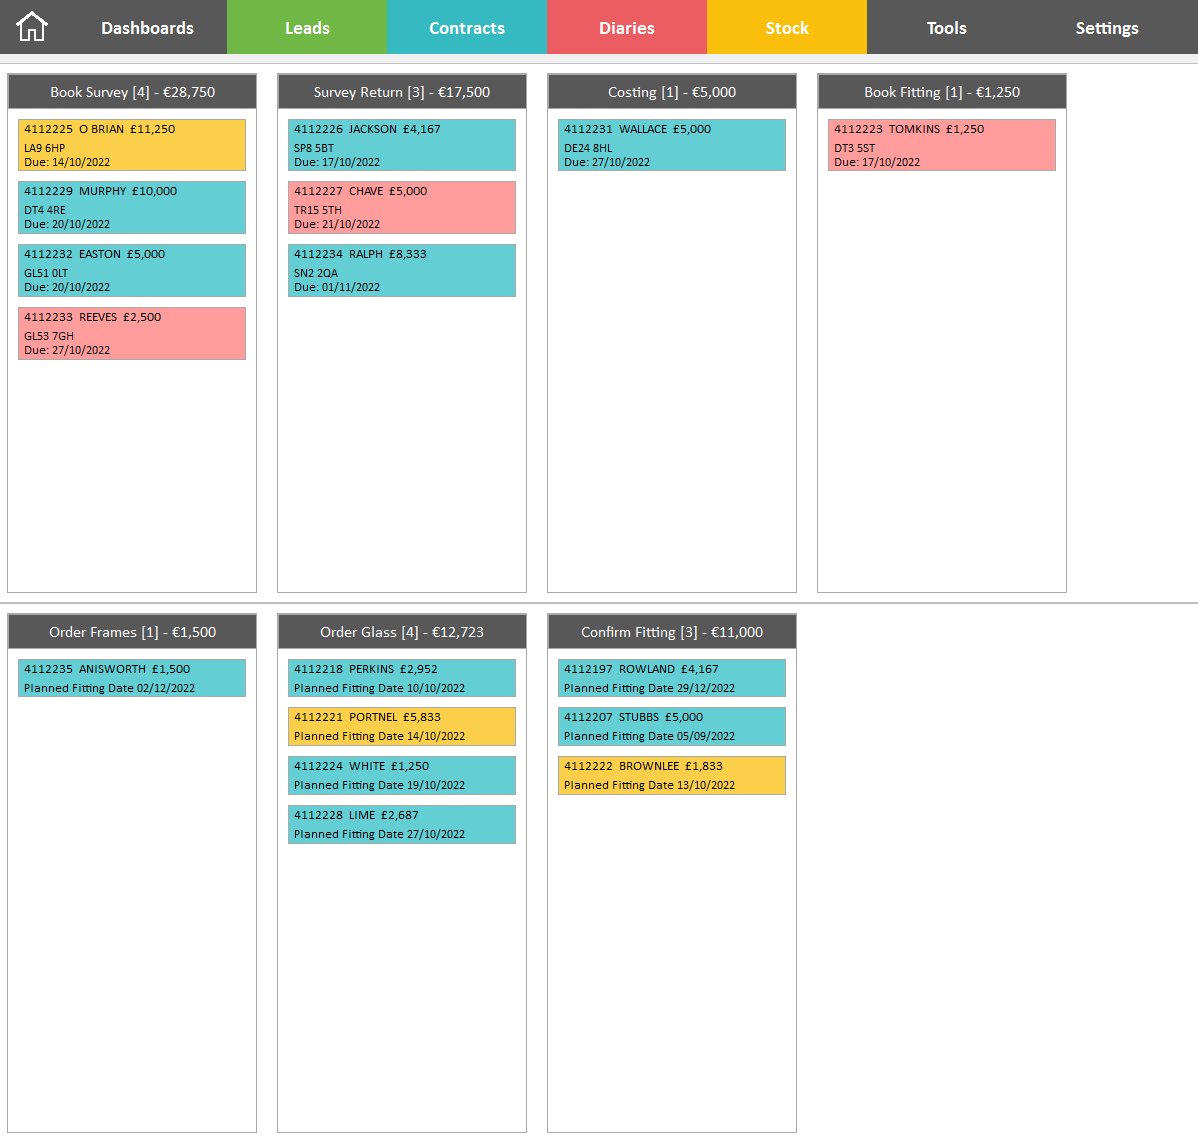
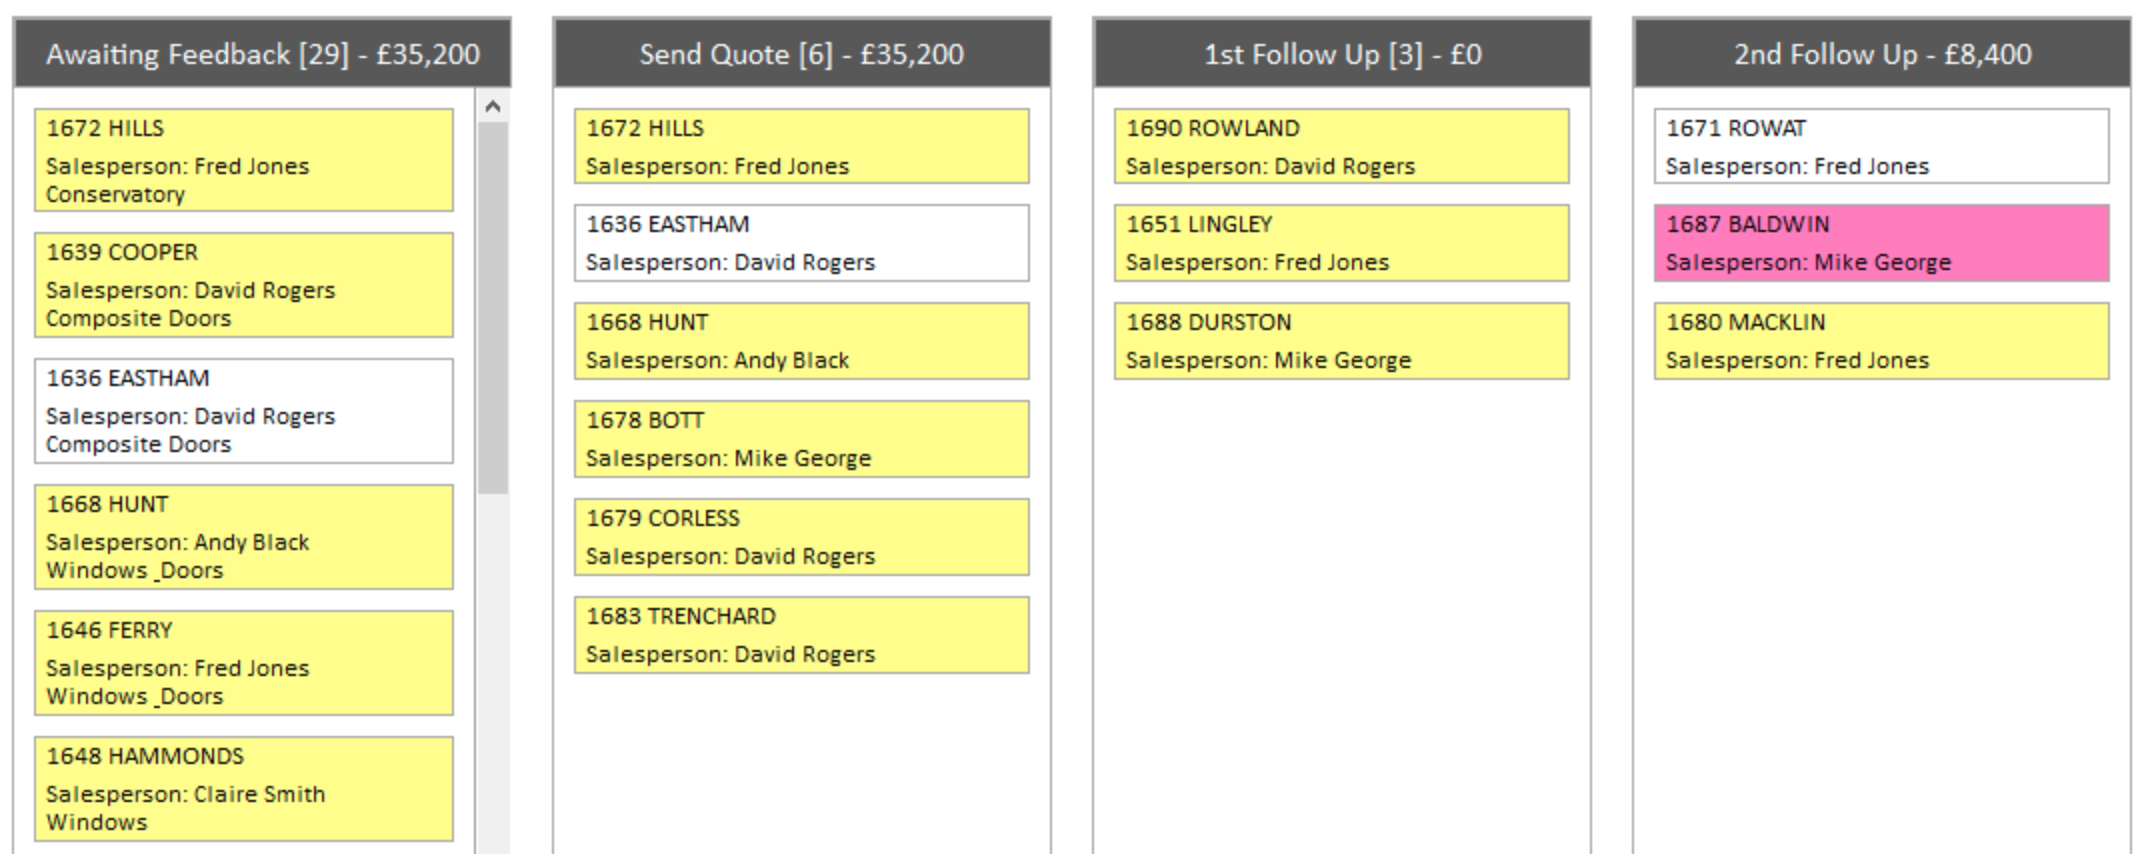
With the AdminBase Task Board, you can visually monitor your sales and installation pipeline. Each Lead or Contract with action due to be taken can be displayed on a ‘Card’ to show its current stage.
The Task Board is a way of viewing the actions in your checklists that need attention across leads and contracts company wide or per salesperson, branch or team member. The Task Board saves you from running reports and is an immediate view of where the log jams are in your processes.
This help page describes how to set up the AdminBase Task Board.
Before setting up the Task Board, you will need to set up the card colours as they are needed in the Task Board setup. In this tutorial we will be setting up a Lead Task Board, however the process is the same for a Contract Task Board based on the Contract checklist.
Card Colour Setup
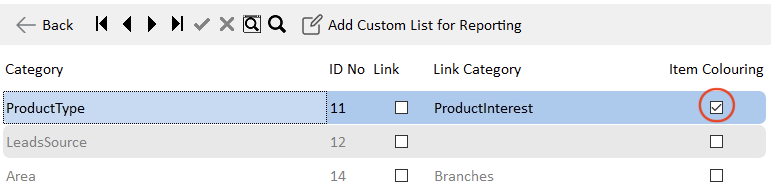
Go to Settings → Other and choose the AdminBase field that will define the colour of the card. This could include categories such as Product Interest, Product Type, Quote Type, Contract Type etc.
Within the top section, tick the Item Colouring checkbox which will add an Item Colour column to the table below.
If the category by which you would like to colour the Task Board doesn't appear within this table, please contact AdminBase Support who will help you add a Custom List.
Double click within the Item Colour field for each option in the bottom table and assign the colour for that option. If you would like to use the same colour for multiple options, you can copy and paste the colour code.

Once the card colours have been set up, you are now ready to to set up the AdminBase Task Board
AdminBase Task Board Setup
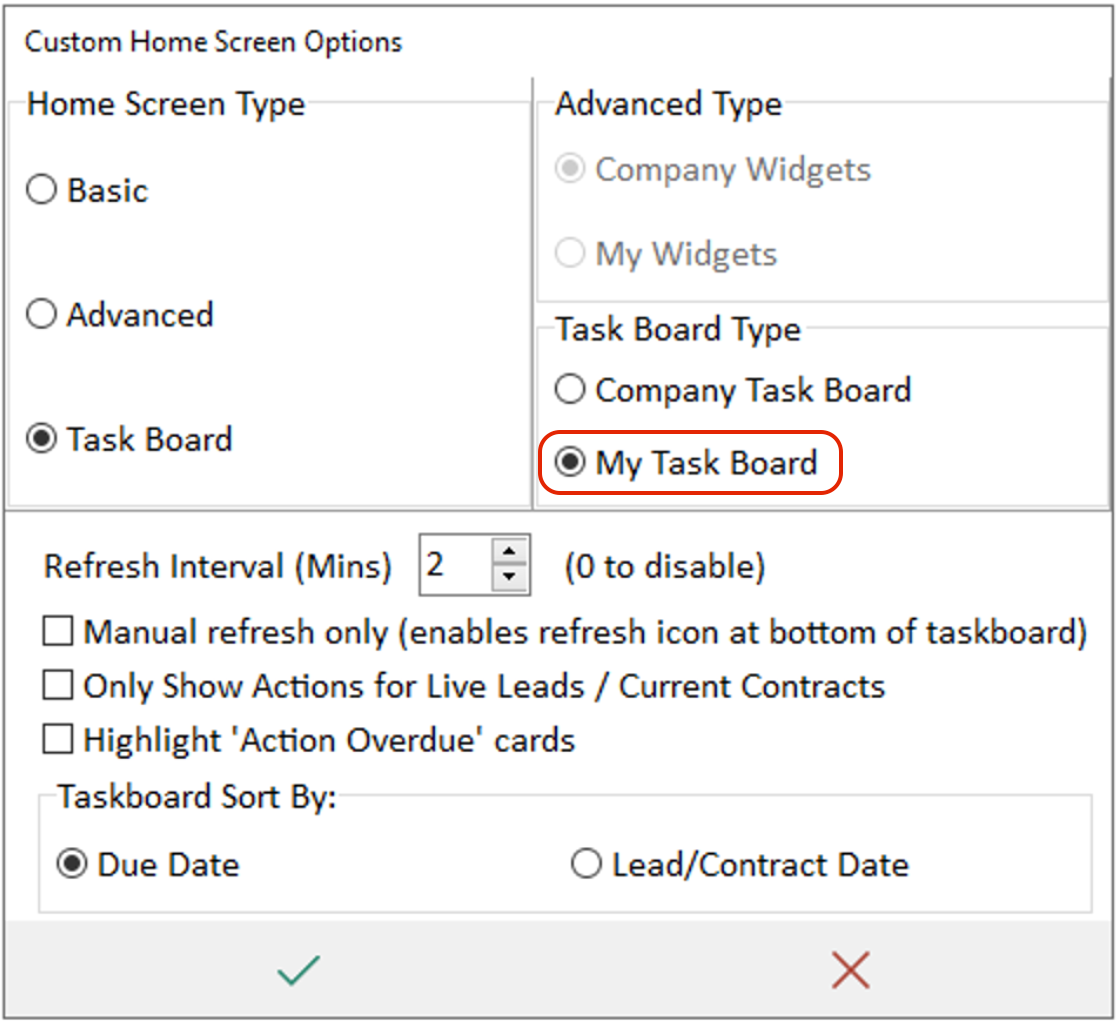
Go to Settings → Home Screen and click Options. Select Task Board as the Home Screen Type and to create a company wide task board select Company Task Board in Task Board Type. User specific Task Boards can be created using My Task Board (see below).
These choices are set per user so it is possible to define a Task Board used by the majority of users and then set certain team members to use My Task Board. This speeds up setup of the Task Boards.
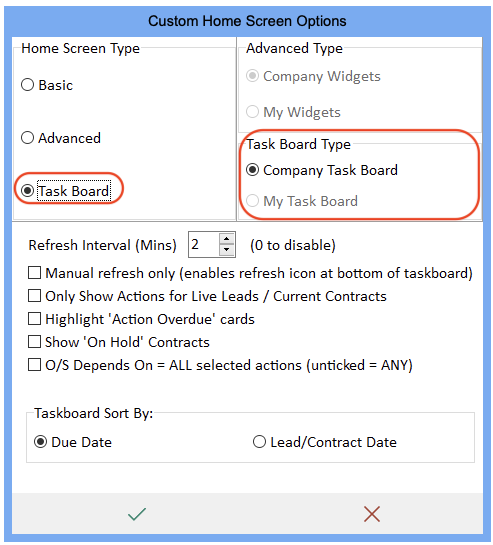
When selecting the Task Board as a home screen option there are a few options that you can customise:
Manual refresh only - This stops the Task Board refreshing each time you click back onto the home screen, and you will have to manually refresh by clicking the icon
Only Show Actions for Live Leads / Contracts - This stops Leads / Contracts with incomplete actions from showing once they are marked as Complete or Dead / Sold
Highlight Action Overdue cards - If you choose to show actions whether they are due or not, this option will highlight the card where the action is overdue.
You can also sort the cards within a list by either the Due Date (from earliest to latest) or Lead / Contract Date (from oldest to newest)
You can have multiple rows of boards, however each row can only include Leads or Contracts. To create a new row, click Add Row. Each row will default to Contracts, unless you click Leads
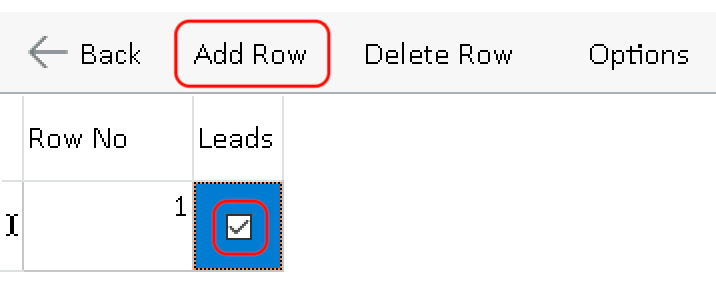
To create a list of Leads on the board, click Add List and give the list a heading
Using the checkboxes, choose the information that you would like to show on the header of this list. It can include…
Count - The number of Leads or Contracts that fall within that list
Total Net - Total Net Value for the Leads or Contracts within this list
Total Gross - Total Gross Value for the Leads or Contracts within this list
Balance - Total Balances outstanding for Leads or Contracts within this list (not applicable for leads)
Action Item - This will show the name of the checklist action within the card
Due Date - Displays the due date of the item. Items are sorted by this date so the most overdue are at the top of the list
Initials - This will show the initials of the person who this checklist action is assigned to
Hide if empty - This will hide the column if there are no Leads or Contract that fall into this list
Ignore Due Date - This will show the Lead or Contract no matter if the action is due or not
Current Only - This will only show Lead or Contacts that are still live. This means that if a Lead is marked as sold or dead, or a contract is marked as installed, then it wont show on the Task Board

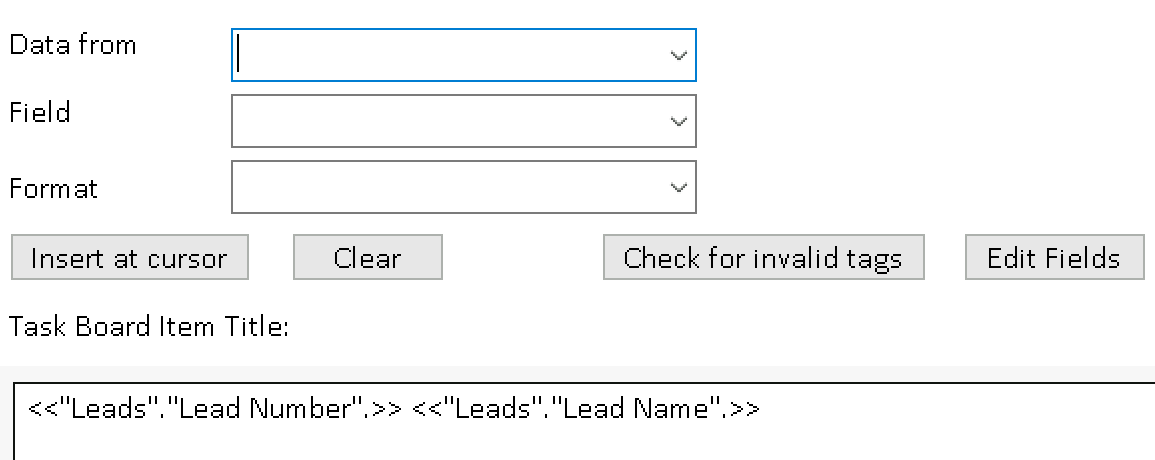
For each Lead or Contract within the list, you can customise the information that is shown as a card header and text. By clicking the 3 dots within Item Title and Item Text, you can choose the AdminBase field to show. Any fields not available can be added for you by support@abinitiosoftware.co.uk
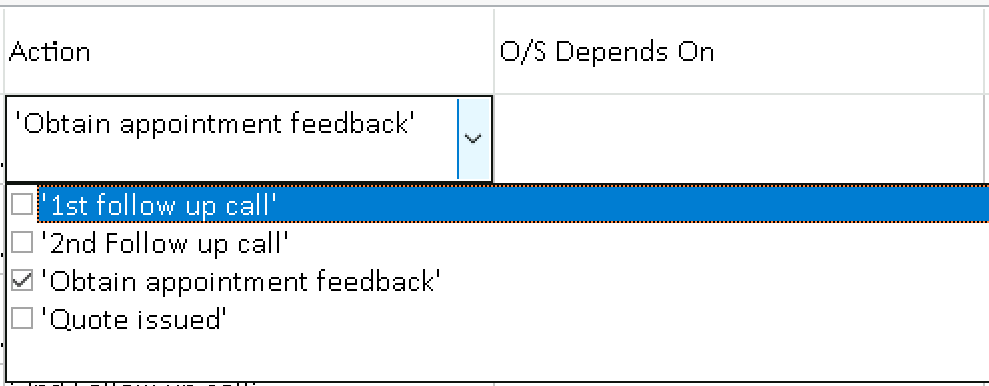
Using the Action field, select the checklist action related to this list. For a Lead or Contact to show in a list, the Checklist action for the list needs to be due today or overdue and not ticked Completed. If you wish to combine multiple actions into one list then you can tick multiple actions here.
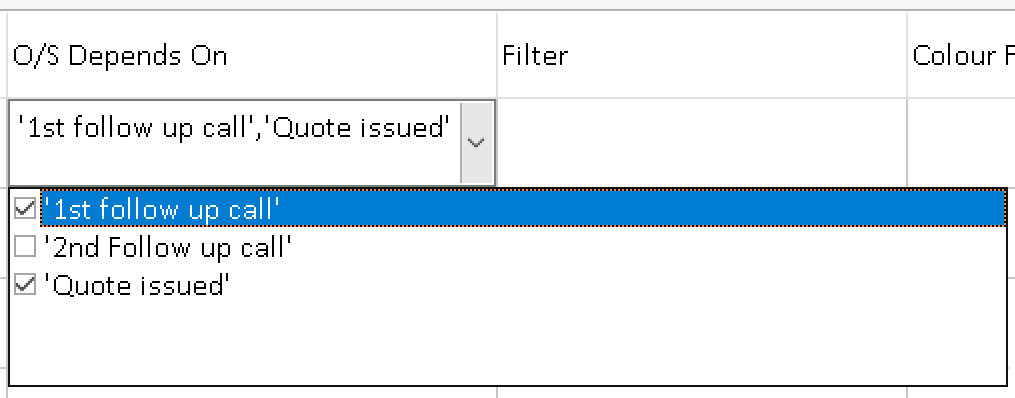
You can make a list dependant on previous actions being completed. You can tick the actions that need to have been completed before the lead or contract shows in this list. Otherwise, leaving it blank will show as soon as the checklist action is due.
You can also add other filters such as Sales Areas (Branch), Sales People or only Checklist Actions that are assigned to a user or a list can show all the actions due for the company.
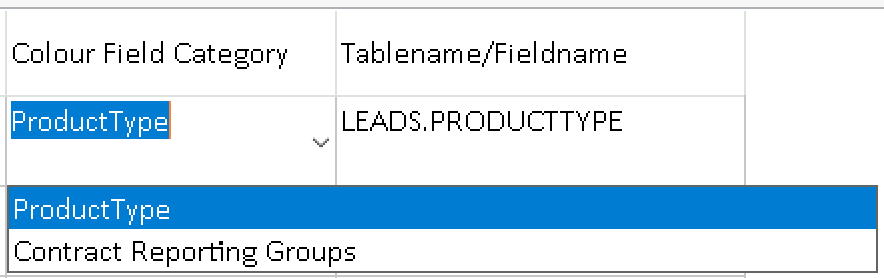
Using Colour Field Category, select the field that we set up previously to define the colour of the card.
Tablename / Fieldname is the field in AdminBase that contains the data to choose the colour. Please contact AdminBase support for the Tablename/Fieldname you should use if you are not sure.
You can then repeat this process to create multiple lists on the same row of the Task Board

If your lists have repeated values you can copy the first entry to all subsequent entries by clicking the column heading. You can also use Move List to rearrange your lists.
Now when you click on the ![]() Home icon in AdminBase you will now see your new AdminBase Task Board. (NB The first time you switch from the Basic or Advanced Home screen you will need to close and re-open AdminBase)
Home icon in AdminBase you will now see your new AdminBase Task Board. (NB The first time you switch from the Basic or Advanced Home screen you will need to close and re-open AdminBase)
Creating Different Task Boards for Different Users
It is possible to create different Task Boards for different users in AdminBase. So for example your installation team are probably not interested in the sales teams lists.
To do this choose My Task Board in Settings → Home Screen → Options.
The settings for each user will now be stored with their AdminBase user permissions. There is an additional button to help you copy one users settings to the user you are logged in as.

NB By default each users list will show company wide actions on the Task Board. If you want to filter the lists use the filter setting. You can have a salespersons task board only show his leads by choosing Salesperson = Username. His username in User Permissions must match his entry in the list of Salespeople for this to work.
You can also set a Sales Area filter so that only the items for the logged in Branch are shown.
If you want the lists to only show tasks specifically assigned to people in the checklist then the My Checklist items filter will only show items in the lists that match the initials of the logged in user.
If you created a Company Task Board and now want to set up Task Boards for individual users you can use the Copy to User button

Using the Task Board to Improve Workflow
You can double click on each item to be taken directly to the relevant lead or contract. This makes finding what needs doing and updating the checklist when done fast and efficient.
It is important to keep the lists as short as possible so consider what each team member actually needs to see and if you need help setting up the Task Board to focus on each team members responsibilities then AdminBase Support can assist you. Call on 01283 551005 or email support@abinitiosupport.co.uk for assistance.
Setup Tips
Keep your checklist up to date - review each checklist for each contract type and remove unnecessary items. Tools → Dashboard Manager → Dashboard Maintenance will make this a simple task.
Of you have an action that is on several contract types try to keep the text of the action consistent. Eg “Check Items Received”, “Check All Items Received”, “Check items received”. You can group these into one list but it is better to keep them the same for future maintenance of your lists.
Create the most detailed Task Board first - it is then easy to copy to other users and remove what they don’t need than to do it the other way round.
If you change your checklist you will need to reflect those changes in your Task Board setup