Importing Tool

Choose the Source
Firstly choose your source data, this must be of type CSV. If the CSV file has a header row then tick the ‘Has Header’ row option. This ensures the header row will not be imported into your data and means you can use the enhanced functionality of the Import Utility.
Choose the Target
Now choose the AdminBase table you wish to import into. In this example we want to import into the PLBATCH table. We would like to know what the errors are with our file, if there are any so we tick the option to ‘Write Exceptions in Error File’.
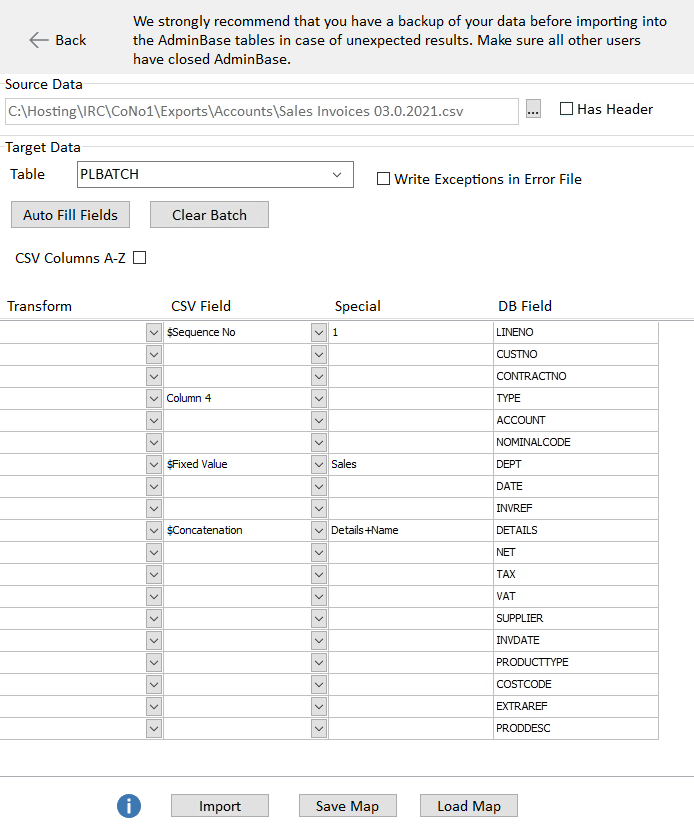
You will now need to fill in the four column grid, this maps the values in the CSV to the database table. The far right side of the grid has the names of the columns in the database table. For each of these you can specify a Transform, the CSV field you wish to insert into that column and any Special parameters.
Transform
Upper case CONVERTS ALL TEXT TO UPPERCASE
Lower case converts all text to lowercase
Proper Case Converts All Text To Proper Case
CSV Field
If your CSV field has a header then this will be the name of the column you wish to use. If your CSV hasn’t got a header this will be Column1, Column 2 etc.
There are also a couple of special types:-
$Sequence No You specify a value in the Special column that the sequence will start from ie. 1. The utility will insert each row incrementing this number.
$Fixed Value You specify in the Special column the value you wish to use, this is static and will not change
$Concatenation You specify the CSV column names you wish to concatenate in the Special column joined by a plus sign (+). The import will append these together separated by a space
$Next Key You can specify which columns to group the data by in the Special column, it will then return the next key for the DB field specified. eg. CUSTNO~CONTRACTNO you are adding a payment line but you do not know the next Line no on the Finance tab in AdminBase.
It's also possible to do a lookup. ie. In your csv you have a column containing the contract number but not
the customer number. In the special column specify [CCR]~[CONTRACTNO]~[CUSTNO] which will look in the CCR table using CONTRACTNO and then return the CUSTNO column's value.
You can also specify the exact values to be converted to something else eg You have a column in your csv
where a Yes or a No needs to be changed to a True or False. For this you would enter Yes=True;No=False
By default the names in the CSV column dropdown will appear in the order they are in the CSV file. If you would like them in alphabetical order then tick the ‘CSV column A-Z’ option.
Map
Once you have your map setup you might want to save it for use later, this can save time. Use the ‘Save Map’ button to save the map to a file you can use later.
To bring back the grid, select your source, target and use the ‘Load Map’ button to bring back the grid.
Running the Import
When you are ready click the ‘Import’ button, the utility will update you on its progress.
TOP TIP: If your CSV file has a header and the names of your columns match those of the Target you can the ‘Auto fill fields’ button. This will choose the CSV field that matches the name of the column in the table to save you having to manually select each one.